The original King's Quest provided a dramatic jump in graphical abilities for 1984: a simulated 3D environment (in 16 glorious colors) where the player's character could move in front, behind, and around objects on the screen (3D environments love prepositions). For a time when graphics were generally limited to static images displayed in either monochrome or perhaps 4 CGA colors, this was quite revolutionary. What was cutting-edge for the time comes across as incredibly simplistic and bland today, yet it delivers its own particular brand of charm (deeply fueled by nostalgia), but with its limited palette of 16 bright colors, it offers an interesting set of constraints to generate digital art.
My work on King's Quest I - Redux focused mostly functional improvements, but I did make some small graphical improvements in the game (updating inventory objects, filling in inconsistent shading, removing invasive palm trees and sickly looking flora, etc.). Despite the limitations of the AGI graphics capabilities, the AGI version of King's Quest IV and Gold Rush! displayed what the engine could perform.
In the third part of my series which inspected reverse engineering Sierra's AGI game engine, I focused primarily on how colors are represented in these games. Trying to downscale a realistic photo to look like 80s computer graphics provides for some interesting challenges — some fairly trivial and others far more in depth.
To further explore the possibilities of creating semi-realistic artwork from actual photos, I created a plug-in for the Acorn image editor. This plug-in attempts to generate 80s-style graphics from real images, which could potentially be added to an AGI game. Based upon the nature and inspiration of the script, it has been named Agifier.
Screenshots
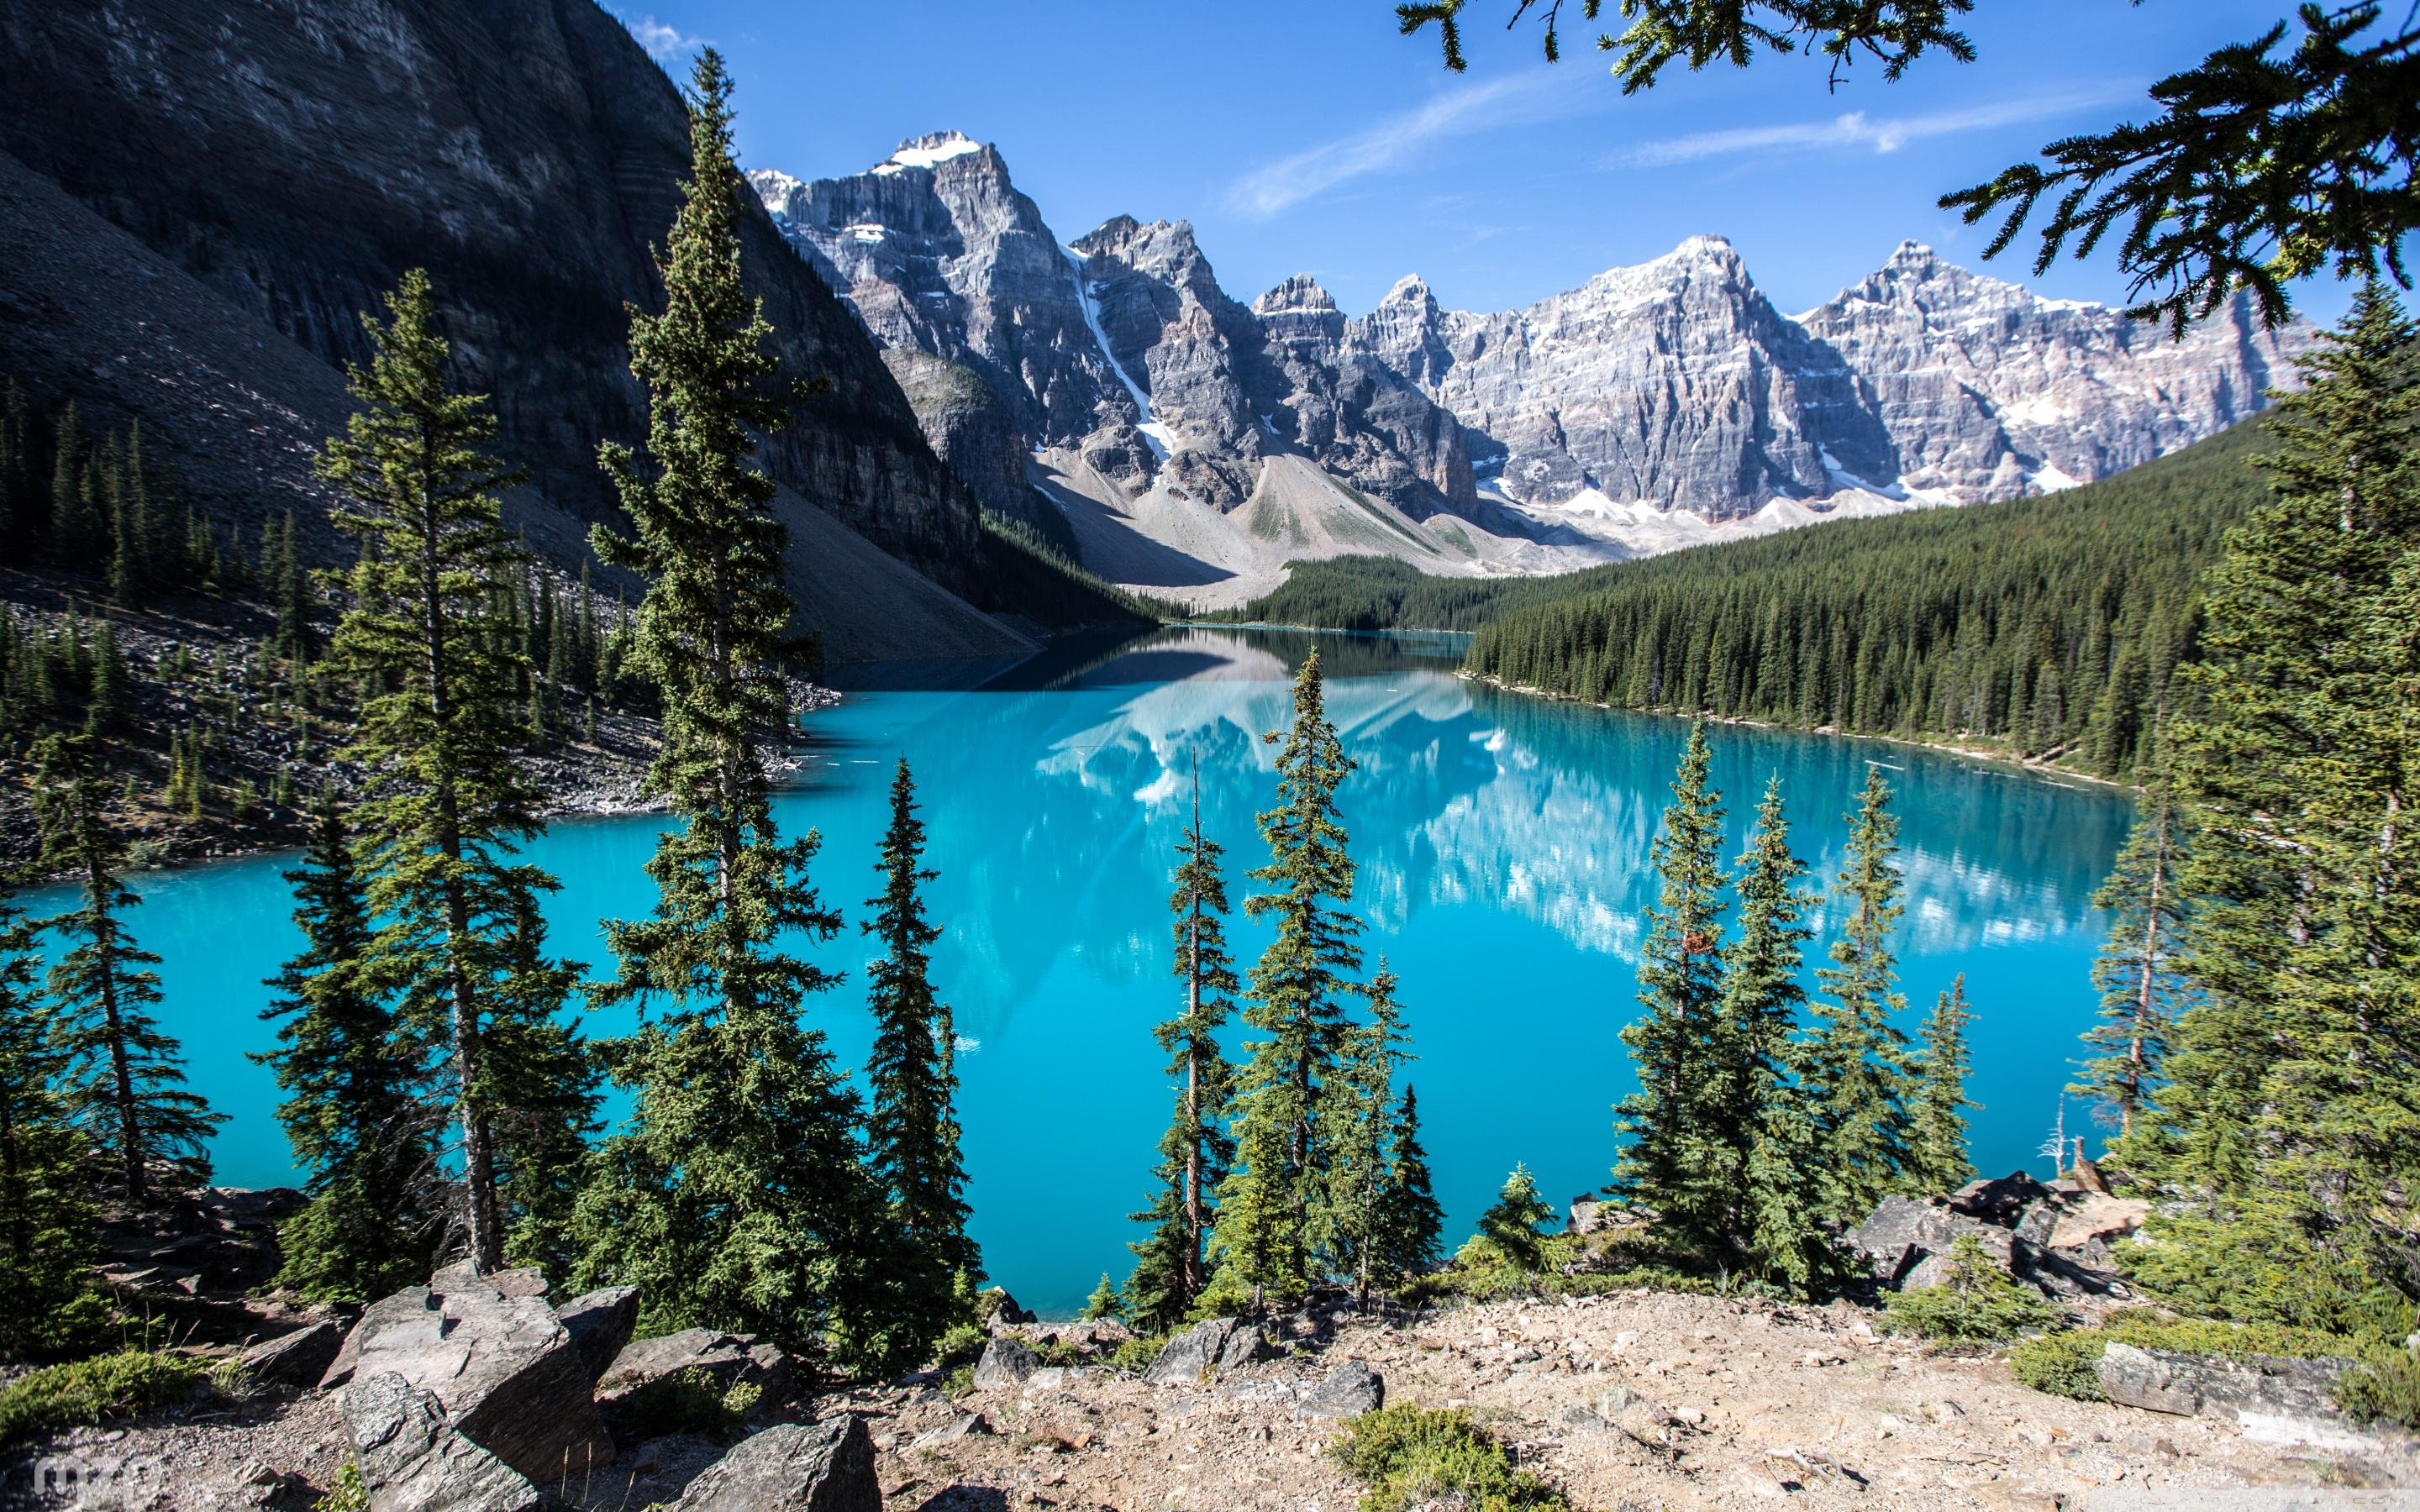
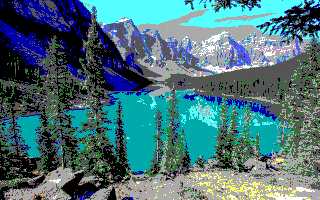
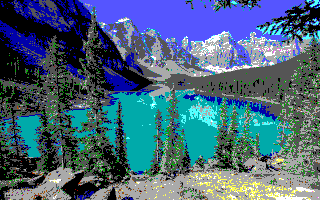
Below are examples of the Agifier script being run on a photo of Moraine Lake in Banff National Park. For some images, the plug-in does a fairly decent job, but it is not perfect, especially where subtle colors are concerned. The manually retouched image is the same as the second photo, but with the sky coloring updated by hand. This script tries to best match real world colors to EGA colors, but there are areas where manual intervention is needed for corrections.
Original
Modified by Agifier Acorn Plug-In

Manually Retouched

Download + Installation
- Download: Download the files directly from GitHub or install via git with the command
git clone https://github.com/edenwaith/Agifier.git - Installation: Copy the
Agifier.acpluginplug-in bundle (found inside the Agifier folder) into~/Library/Application Support/Acorn/Plug-Insfolder on your computer. Create thePlug-Insfolder if it does not exist yet. - Usage: Restart Acorn after copying over the plug-in, then open a file and select the Filter > Stylize > Agifier menu. This will reduce the size of the image and reduce the color palette down to the standard 16 EGA colors that were used in Sierra games.
Conclusion
As of this writing, this is version 1.1 of the Agifier plug-in. The initial version was written back in July 2020, but it lacked the proper reduction of colors to the 16 color EGA palette. There are still several areas of improvement such as resizing using double-wide pixels (so each drawn pixel's dimensions are actually 2x1), additional color correction, and ensuring that resizing an image uses the nearest neighbor algorithm (not Lanczos or affine transform) to create a more pixel-y appearance. A follow up post will go into further detail about the technical aspects of this script.
