Edenwaith Blog
20th February 2022 | Games
The previous article about the Logitech CyberMan 3D Controller listed a number of games which worked with this unique peripheral. The CyberMan came with four demos: DOOM, Body Adventure, Shadowcaster, and Terminator: Rampage to showcase what its extended functionality could provide in games. This post will briefly cover these demos plus a couple other products such as the Mechwarrior II: The Clans demo and several SSI games.
Note: To ensure that the CyberMan is recognized, any other mouse drivers need to be disabled first. In my initial tests, the DOOM demo worked without any modifications, but none of the other products displayed any of the CyberMan's extra functionality. I ended up going into the autoexec.bat and commented out the code which loaded the CuteMouse driver, which left only the Logitech 6.31E driver to be loaded.
The autoexec.bat file configuration:
SET GALAXY=A220 I5 D1 K10 P530 T6
SET BLASTER=A220 I5 D1 T4
@ECHO OFF
rem C:\SOUND144\UTILITY\AZCAL.EXE
PROMPT $P$G
PATH C:\WINDOWS;C:\DOS;C:\
PATH %PATH%;C:\CYBERMAN
SET LMOUSE=C:\CYBERMAN
C:\CYBERMAN\MOUSE DUAL
SET MSINPUT=C:\MSINPUT
REM LH C:\MSINPUT\MOUSE\MOUSE.EXE /Q
REM LH C:\MOUSE\CTMOUSE.EXE
rem LH C:\PBTOOLS\VGAUTIL\CLMODE.EXE t640=60 t800=60 t1024=87 t1280=87
REM LH /L:0 C:\DOS\SMARTDRV.EXE 1024 512 /X
LH C:\PBTOOLS\VGAUTIL\TSRFONT.COM
LH C:\DOS\MSCDEX.EXE /D:MSCD001 /L:D
SET DIRCMD=/O
SET TEMP=C:\PBTOOLS\WINTEMP
SET WINPMT=[WINDOWS] $P$G
SET SOUND=C:\SOUND144
REM WIN
REM TYPE C:\NAV30\EXIT2.MSG
DOOM
Of all the titles which supported the Logitech CyberMan, this is the granddaddy of them all.
Without any additional configuration, the CyberMan worked right out of the box with this demo, proving that the device worked properly. It's possible to turn, strafe, move, and fire with the just the CyberMan, but the experience isn't great. I still prefer the standard keyboard+mouse combination, but I imagine with enough practice, one could get adept at using the CyberMan for the quick-twitch reactions in DOOM.
There's also a source file which indicates that Heretic (a game based off of the DOOM engine) also supported the CyberMan. I haven't tried this, but I would assume it plays in a similar manner to DOOM's controls. Further investigation will be needed to determine how many games based off of the DOOM engine also supported the CyberMan.
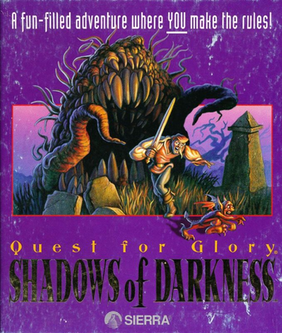
Quest for Glory: Shadows of Darkness (QFG4)
This is the game that started it all for me to check out the CyberMan. I ended up going down many paths in an attempt to get the CyberMan to work with a modern Mac and emulation software like DOSBox, ScummVM, or VirtualBox, but with no luck. I even bought a serial port card for a PC and installed that, but without proper drivers (the initial drivers were intended for DOS 6.22 and Windows 3.11), a modern version of Windows only identifies the CyberMan as a simple 3-button mouse. Once I obtained an era-appropriate computer (Packard Bell Legend 814CD), I was then able to get the CyberMan to work with these games.
As I mentioned in my comparison between the floppy disk and CD versions of this game, only the floppy disk version had support for the Logitech CyberMan, whereas a flyer included with the CD version explicitly mentions that it no longer supports that peripheral.
The CyberMan works decently with this game. The middle button seems to enable a stabbing/thrust attack instead of a swipe. I do not recall seeing this with normal mouse, so this is either something special with the CyberMan, or I had never tried this, or perhaps it's something unique with the floppy disk version. If batteries are inserted, there is some tactile feedback when the player is attacked. Against weaker enemies, such as the Vorpal Bunny or Badders, there is only a small buzz, but against bigger enemies, getting attacked will result in a larger vibration. It's more of a novelty feature than a truly useful addition, but the concept also extended to the N64 rumble pack and much more effectively in the eighth generation of game console controllers.
Here are some images of the CyberMan ad which came included in the purple box version of Quest for Glory: Shadows of Darkness.
I have a number of other topics planned about the floppy disk version of QFG4 and CyberMan, but those will be reserved for a potential future post.
Body Adventure
This is not a traditional game, but an educational product to learn about human anatomy. It was developed by Knowledge Adventure, which focused on educational titles. Knowledge Adventure would eventually be acquired by CUC International, the same company that acquired Sierra On-Line. Of all of the products I have tested, this worked out the best with the CyberMan by making use of the controller's 3D aspects to rotate a wireframe organ (e.g. stomach, heart, etc.) in all three dimensions. This demo was added with the CyberMan to replace the Mechwarrior II demo which was originally intended to be included.
According to the wiki page:
On November 25, 2014, five Knowledge Adventure titles were re-released digitally as DRM-Free exclusives on ZOOM-Platform.com through a partnership between JumpStart Games and the Jordan Freeman Group. The five titles included 3D Body Adventure, 3D Dinosaur Adventure, Dinosaur Adventure (Original), Space Adventure, and Undersea Adventure.
ShadowCaster
ShadowCaster was developed by Raven, the same company which also made the Heretic and Hexen games. The game engine was written by id Software's John Carmack, which was "a successor of the Wolfenstein 3D engine and a predecessor of the Doom engine." This game is a 3D hack-n-slash from 1993, an early adopter of the CyberMan.
Controls:
- The standard left-right-forward-back movements just moves the cursor on the screen.
- Up: jump
- Pitch: pitch forward to move forward, pitch back for backwards movement.
- Yaw: turn left or right.
- Roll: strafe left or right.
- Tactile vibration: The tactile vibration works when hit by enemies. There's only a single vibration setting in my initial testing, whereas other games will use different levels. The wiki page says it vibrates when hitting a wall, as well, but I never experienced this.
The Terminator: Rampage
I never could get this to run. When I tried to install the demo, it caused the computer to reboot. Even under DOSBox, it had the same effect. Perhaps if I ever find the full game, I will be able to properly test this game.
According to the wiki page, this game used the same game engine as The Elder Scrolls: Arena. However, I have not found any evidence that this Elder Scrolls game supported the CyberMan.
Mechwarrior II: The Clans (Demo 2)
Mechwarrior II: The Clans demo did not make it into the original demo bundle, so it was replaced with Body Adventure. From what I could gather, it sounded like early development of Mechwarrior 2 went through developer hell, and eventually evolved from being The Clans into 31st Century Combat.
I wasn't very good at the game, but the CyberMan did seem to work, but I was often resorting to using the keyboard to move around. As my mech was dying, the CyberMan did pulse lightly like a heartbeat, better than the strong whirring that some games have used for the tactile feature.
Since The Clans demo did not come with the CyberMan, I had to do some searching for it. From what I've read, there were two demos, but the second one seems to be the more playable version. I found several downloads for the demo, often coming in at 1.4MB, just the right size for a high density floppy disk, but I could never get any of those versions to install properly on my test machine (a Packard Bell Legend 814CD). I did eventually find a demo that came in closer to 3MB. I burned that to a CD and then installed it onto the Packard Bell, and that version worked. Unfortunately, I forgot where I exactly found that particular version of the demo after downloading several variants. Here are several links relating to the Mechwarrior II demo and related pages:
The supported controls as mentioned in the README file:
*** Cyberman ***
MechWarrior 2 fully supports the Cyberman by Logitech in the following
way:
Left Button   = Fires selected weapon
Right Button  = Change weapons
Pitch Forward = Increase throttle
Pitch Back    = Decrease throttle
Roll Left     = Left view
Roll Right    = Right view
Z-Up          = Up view (pull up)
Yaw Left      = Turn torso left
Yaw Right     = Turn torso right
Z-Down        = Center torso (push down)

Targeting the Mech is controlled by moving the Cyberman Up and Down
within the X and Y axis square.
SSI Games
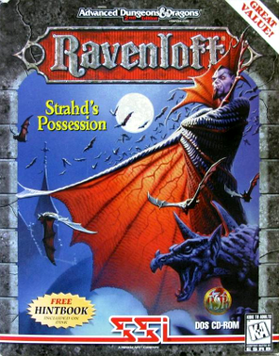
All three of these games (Menzoberranzan, Strahd's Possession, and Stone Prophet) were developed by DreamForge Intertainment and published by Strategic Simulations, Inc. who were notable for many of their computer games based off of AD&D properties, such Pools of Radiance and Champions of Krynn (both which were my introduction to AD&D). These three games used the same game engine, so they all share the same interface and controls.
When I initially tried using the CyberMan with these titles, it only acted like a standard mouse. I knew that the CyberMan's full suite of functionality did work, as proven with the DOOM demo. I later learned that I had to disable the CuteMouse DOS driver from the autoexec.bat file. Even though the Logitech 6.31E driver supports dual mice, having CuteMouse also loaded disabled the additional CyberMan functionality. Once I got the CyberMan enabled, I was able to test it out with the SSI games. The CyberMan works, but the additional controls aren't particularly groundbreaking in what they add to the game. There were still areas in the game where I needed to press the ESC key to skip a scene, so the keyboard was still required at times.
Controls:
- Yaw: Turn the party left or right
- Roll: Slide party left or right
- Pitch: Move party forward or backward
- Y: Move mouse up and down the screen
- X: Move mouse left and right on the screen
- Z: Not used
- Pitch and Yaw can be used in conjunction with each other so that you can move forward and turn at the same time.
Side notes:
It's nice that these games offer an option with a party already created to quickly dive into the game (versus the traditional method of endlessly curating your characters during the creation process). I remember spending several hours just setting up the party in Champions of Krynn, and this apparently hasn't changed much with modern RPGs, so the quick start approach is handy for one who just wants to play immediately.
I kept getting a generic "Unable to open resource file" when trying to start any of these games, until I tried Stone Prophet which had a slightly more useful error message that mentioned it could not open the file 'RES0/D:\RES0', which indicated I forgot to put in the game's CD. Sierra games tended to be a little more informative when the CD was required, but I had encountered a variety of configuration issues with the games reviewed in this article, so this looked like just one more error.
Conclusion
So how did the CyberMan fare with these products? The CyberMan was a bold idea, but its implementation was not the best, and it did not gain much support aside from a handful of games in the mid-1990s. Some of the games seemed to offer minimal support, but others made better use of what the CyberMan offered. Not all games bothered with the tactile feedback, some kept it very basic, and others were a little more creative. With the modern PS5 controller, the tactile feedback of the buttons is a feature which adds additional interactivity with games, and this shows that Logitech was ahead of many competitors with this idea. However, I've found that moving the cursor around with the CyberMan feels fairly stiff and lacks the precision that a standard mouse would normally provide, so it does not do well as a general input device, especially when used in Windows 3.1.
1st January 2022 | Edenwaith
This past year marked the 20th anniversary of the Edenwaith website, which has diligently served as a repository for my software projects and random technical experiments. The first decade was dedicated to creating new software for the burgeoning Mac OS X market. Most of those initial apps have been retired now, but a couple of mainstays like Permanent Eraser, EdenList, and even EdenMath are still around.
There was not much in the way of traditional software development in 2021, primarily due to my job being quite busy for the first half of the year, so there was less time and energy to lend to side projects. However, there were a couple of software updates with AGI Studio and EdenList. After several years of contemplation, I have finally retired 33 RPM. Work on Permanent Eraser 3.0 has begun in earnest, but there is no defined timeframe for when it will be released. I did manage to write and complete my first short story in seven years (in addition to revising my current novel which I hope to have completed the second draft in 2022) with the Space Quest-themed Another Day, Another Buckazoid. There's also been some interesting research done with topics of color theory, serial drivers, and fonts, all which I hope to delve into further this year.
Software Updates
Prominent Blog Posts
While there were not many software updates, fourteen blog posts were written, and here are some of the more interesting ones from 2021. The article about the Logitech CyberMan had been in the works for quite awhile and became quite the deep dive into how serial mice work and trying to get it to work with modern computers.
2022
This year will likely focus on more game-related topics, and less on traditional software. However, I do now have an M1-equipped MacBook Pro and have more reason to update some Mac software to support the new Apple Silicon chips. The following are a number of topics I intend on researching and/or working on:
- More AGS Mac ports — looking at also including ARM support for the newer M1 Macs. Perhaps even learn how to do Mac ports for other game engines.
- Further research into color theory to improve the Agifier script
- Additional experimentation with the Logitech CyberMan and compatible games
- Write a Logitech CyberMan serial driver for the Mac
- Write a Mac audio player for either AGI Studio or GameAudioPlayer
- Research the issue where color Sierra AGI games had issues on newer color Macs of the 1990s
- Design fonts, particularly updating classic Sierra-style fonts using Glyphs
and FontStruct
- If I complete my 2nd draft in good time, then will look into other game development for things like TWINE
or the Playdate
- Continue work on Permanent Eraser 3.0
27th December 2021 | Games
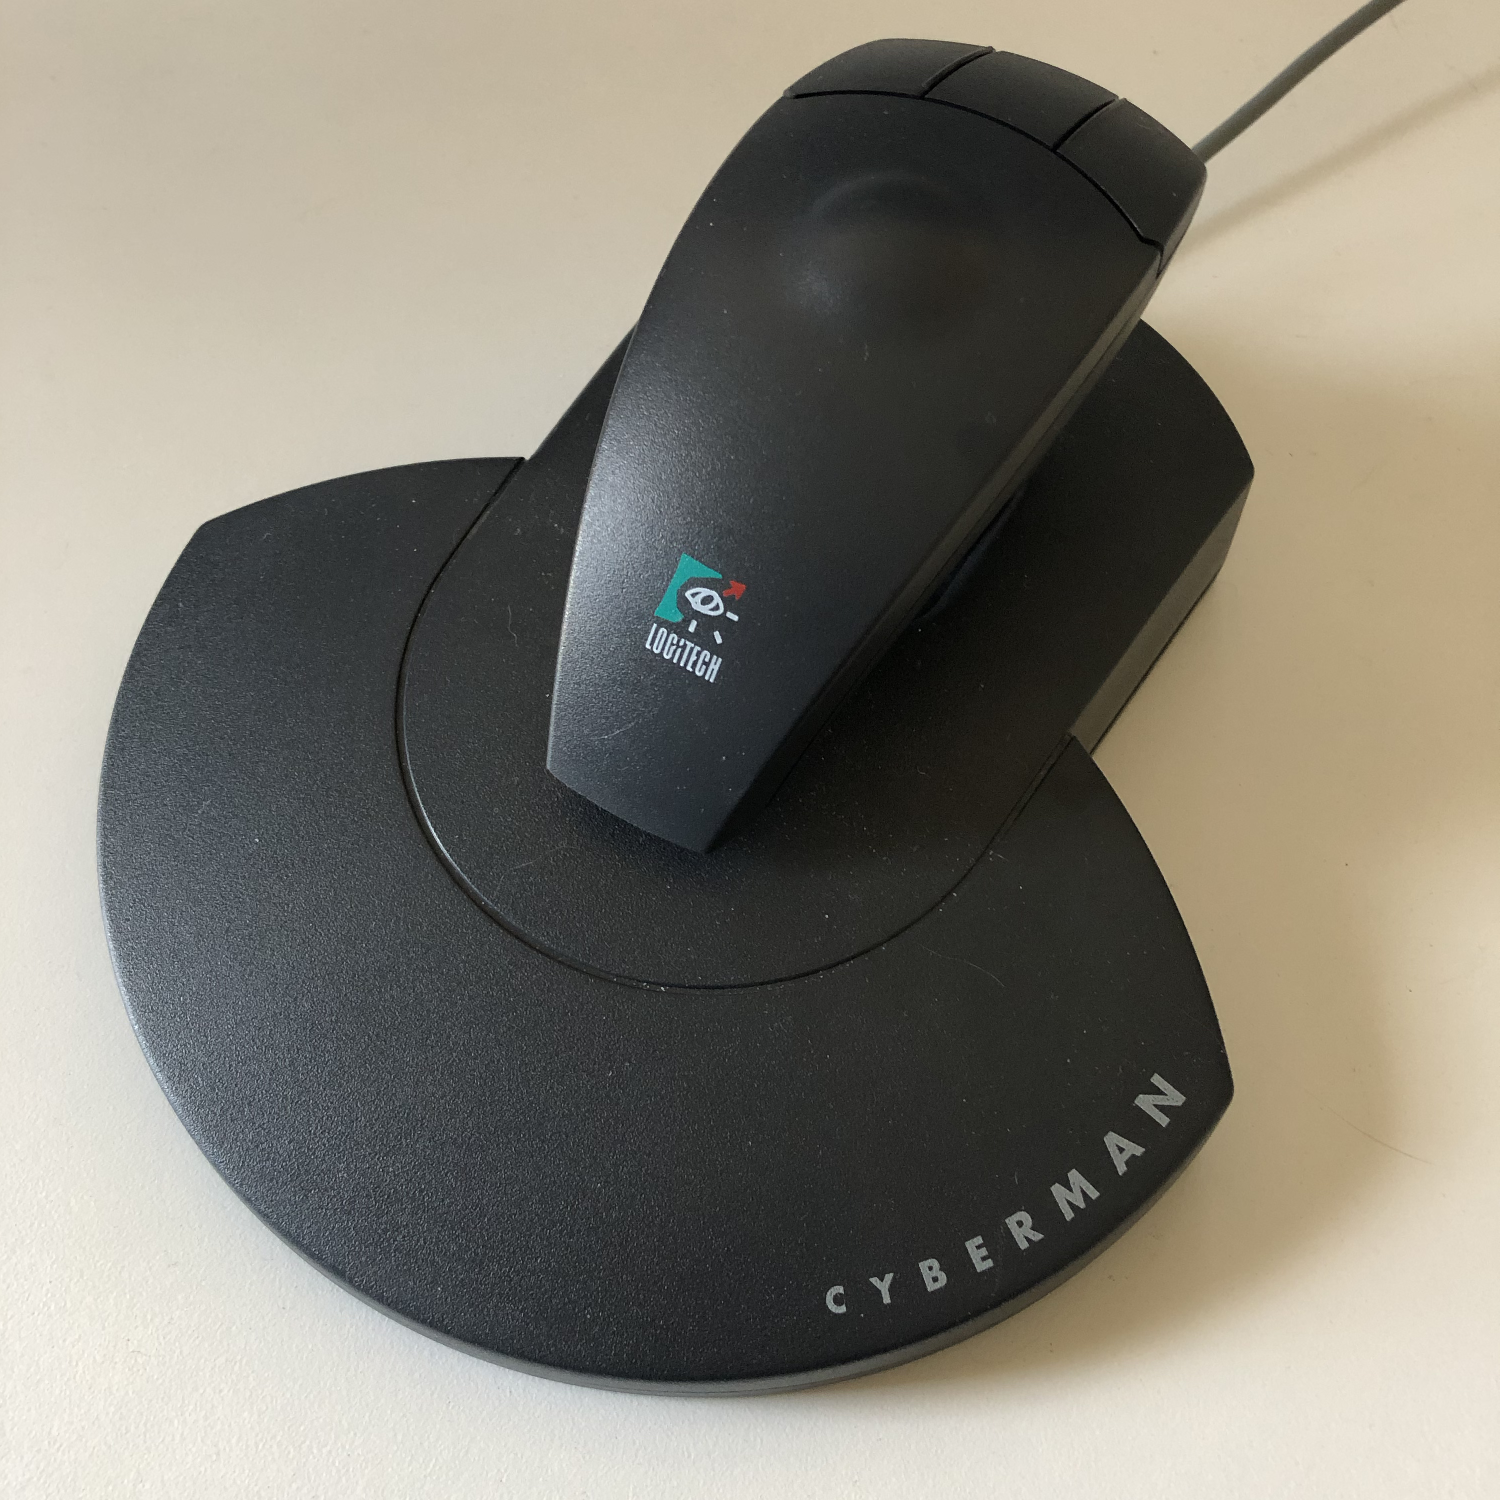
One of the things which made the floppy disk version of Quest for Glory: Shadows of Darkness (QFG4) unique from its CD successor is that it supported the original Logitech CyberMan 3D Controller. The CyberMan was an interesting peripheral which acts like a mouse which can (somewhat) move in 3D space (X-Y-Z coordinates in addition to pitch, yaw, and roll). It was only supported on a handful of games from the mid-90s, such as DOOM, Hexen, and Quest for Glory: Shadows of Darkness. If batteries are added, the CyberMan also provides tactile feedback. This was an early attempt of creating a 6-axis controller, but it wouldn't be effectively implemented until the Playstation 3's SIXAXIS controller.
The following products supported the CyberMan:
- DOOM
- Hexen
- Quest for Glory: Shadows of Darkness
- Body Adventure
- Lands of Lore
- Shadowcaster
- Spectre VR
- System Shock
- Terminator Rampage
- Lemmings 3D
- Descent
- Ravenloft: Strahd's Possession
- Ravenloft: Stone Prophet
- Menzoberranzan
- Stonekeep
- Lords of Midnight
- Mechwarrior 2
- Rise of the Triad
- Under a Killing Moon
- Zephyr
This list is not exhaustive, and as do more research, I discover additional games which supported (or claim to have supported) the CyberMan. The two Ravenloft games and Menzoberranzan are based off of the same game engine, which explains why the CyberMan works with all three. Only the floppy disk version of Quest for Glory 4 worked with the CyberMan, as the CD release explicitly mentions that it does not support this controller.
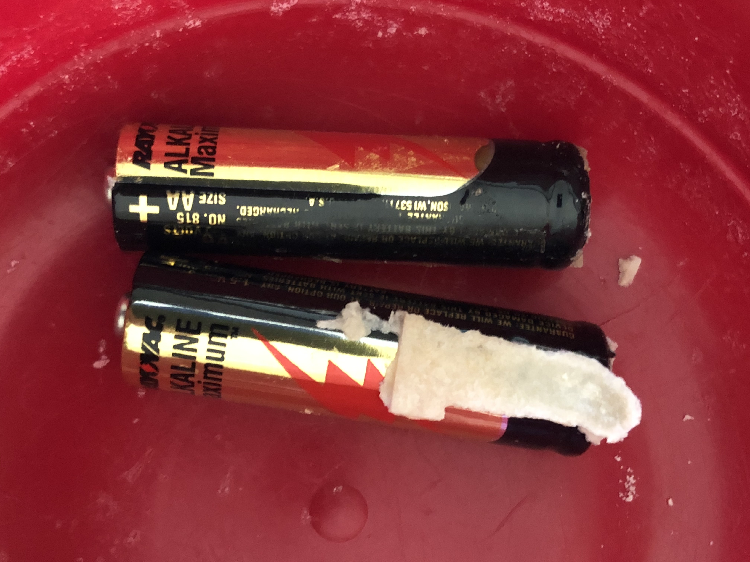
The CyberMan I purchased off eBay came in near pristine condition. The box was in excellent condition, in addition to the manuals, floppy disks, and the controller. The only true evidence that this CyberMan had been used is because batteries had been left inside...and after an inditerminate amount of time, the batteries had leaked. Sigh. Fortunately, after I got everything set up and working, I was able to confirm that the tactile feedback does still work when I tested it in Quest for Glory: Shadows of Darkness.
USB to Serial
The first order of business was to ensure that the device actually worked. The first iteration of the CyberMan was released in 1993, several years before USB became commonplace for computer peripherals. Instead, the CyberMan uses an RS-232 9-pin serial connector, which is an obstacle in trying to interact with modern computers which generally don't have serial ports these days.
Since I initially started the testing on a Mac, I purchased the following cable from Micro Center: QVS USB 2.0 (Type-A) Male to DB-9 RS-232 Serial Male Adapter Cable 6 ft. - Black. To get more details about the cable, I used the Mac's System Profiler which identified the cable as:
USB-Serial Controller:

  Product ID:	0x2303
  Vendor ID:	0x067b  (Prolific Technology, Inc.)
  Version:	3.00
  Speed:	Up to 12 Mb/sec
  Manufacturer:	Prolific Technology Inc.
  Location ID:	0x14100000 / 28
  Current Available (mA):	500
  Current Required (mA):	100
  Extra Operating Current (mA):	0
One note about the supplied power is what USB and traditional serial ports could offer, which generally was enough to power a standard mouse or joystick, but to enable the tactile vibration, batteries were needed to give the extra power.
For some delightful technical goodness, the command line gives a few extra details, such as that the Prolific PL2303 driver is used for this adapter.
% ls /dev/tty.usb*
/dev/tty.usbserial

% kextstat | grep prolific
  188    0 0xffffff7f83ae3000 0x7000     0x7000     com.prolific.driver.PL2303 (1.6.3)
  E55010C7-C7DD-36D8-AE20-E050E3AFCB2B <61 52 6 5 3>

% ioreg -c IOSerialBSDClient | grep usb
      | |                 "IOTTYBaseName" = "usbserial"
      | |                 "IOCalloutDevice" = "/dev/cu.usbserial"
      | |                 "IODialinDevice" = "/dev/tty.usbserial"
      | |                 "IOTTYDevice" = "usbserial"
Another graphical utility to get additional information about the connected adapter is to use the development tool IORegistryExplorer. This app used to be provided with Xcode by default, but now it is a separate download as part of the Additional Tools for Xcode package which is downloaded from Apple's developer portal.
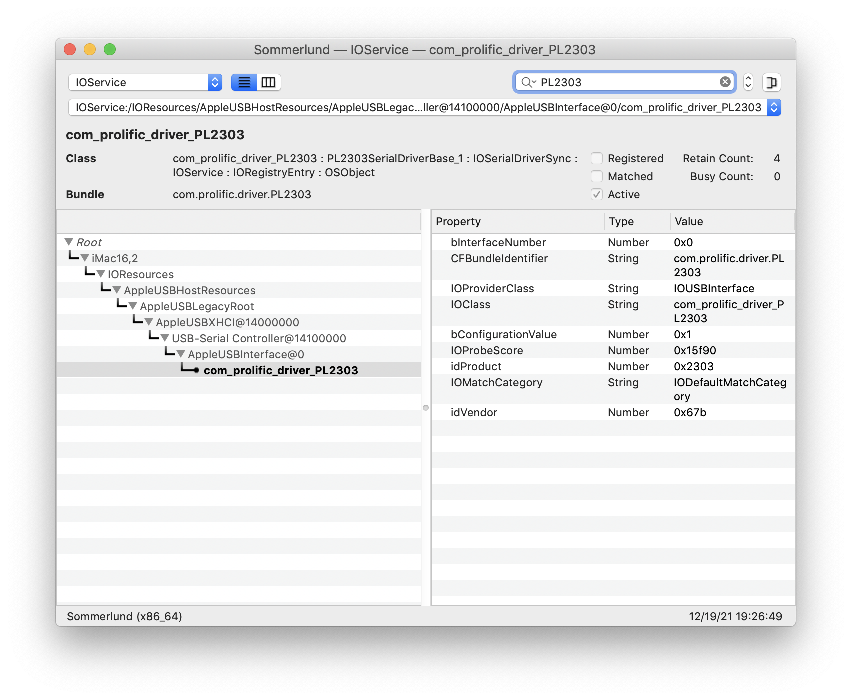
It had been about ten years since I had worked with a USB to serial converter, but I did find some old notes which reminded me I had to look for a PL2303 driver to get the cable to work properly with macOS. Unfortunately, the old driver I had used previously was no longer freely available via its SourceForge page. Fortunately, I found that the manufacturer of my cable did offer an up-to-date driver. Downloading and installing the appropriate driver worked perfectly under macOS Mojave. Note: Extra security measures in more modern versions of macOS (Big Sur and later) seem to have issues with some kernel extensions, so I have not tried this adapter with macOS Big Sur or Monterey, yet.
Terminal Output
With the PL2303 driver now installed, I next turned to using my favorite serial program Parley from Buttered Cat Software. After setting some options (4800 7-N-1) and connecting the CyberMan (seen as a usbserial device to Parley), I was able to see some output from the device to confirm that it did work.
From Parley (4800 baudrate with 7 data bits : 4800 7-N-1)
**** Port Open
ø�øø��øx�ø��xx�ø��x�ø��x�ø��x�ø��x�ø��x�ø�xøøøø�xøøøø��x�ø��x�ø��x�ø��x�ø��x�ø��x�ø�xøøxøx�x�ø�x�ø�x�ø
��øø��ø��x��x�ø��øø��xx�������������������������������øxøxø���x���xø�ø��ø�ø�x���x���x�
��x���x�x��x�xø�x����x���x�øø��x�ø��x�øø��x�ø��x�øø��x���x���x���x���x���x���x���x���x���x��
�x���x���x���x���x���x���x���x���x���x���x���x���xøxø�xø�øxxø�øxø�xø��øø�ø��x�����ø���x��øø
�ø�ø�øø���������x����øø��x��x��ø��x��øøø��øøø��x��øø
From what I've read, most serial mice used a 1200 baud, 7 bit setting (1200-7-N-1), which is unfortunate since the lowest baud setting in Parley is 4800. Another option was to use command line tools.
screen /dev/cu.usbserial 1200
��������������������������������������������
�����������������������������������������
ͳǟ�Ā�Ā����������������������������������������
�������������������������ô�ß�ñ��������������
ý�ñ�ý�ú�÷�÷�ý�ý�ý�ý�ñ�å�ô���ý���������ϴ�Ϯ�̀�̀�̀�̀�̀�̀�
ý���������������������ô�Ü�Ù�Á�ý����������ý�Ѐ���ë
��������������������������������������������
Ü�ý�ý�ô�Ó�»�¬� �£�¯�¾�ë���������������������������
�������Ѐ�Ѓ�Ѓ����������������������������������
�������������������̀�̀�̀�̀�̀�����̉�̌�̆�̆�̆�̆�̃�̃�̃�
̃�̆�̃�̀�̀�̀�̀�̀�̀�̀�̀�̀�̀�̀�̀�̀�Ā�����ă�������������
������������������̘�����������ô��²��¯�©�ô�ý��
�������������
Another option I tried was to communicate with a serial device in DOS in either DOSBox or VirtualBox. Unfortunately, I was never able to get any of these emulated versions of DOS running on my Mac (yet) to see the serial device, but here are some different options I tried.
MODE COM1:1200,N,7,1,P

https://kb.iu.edu/d/afao
> kermit
set port 1
set baud 9600
connect
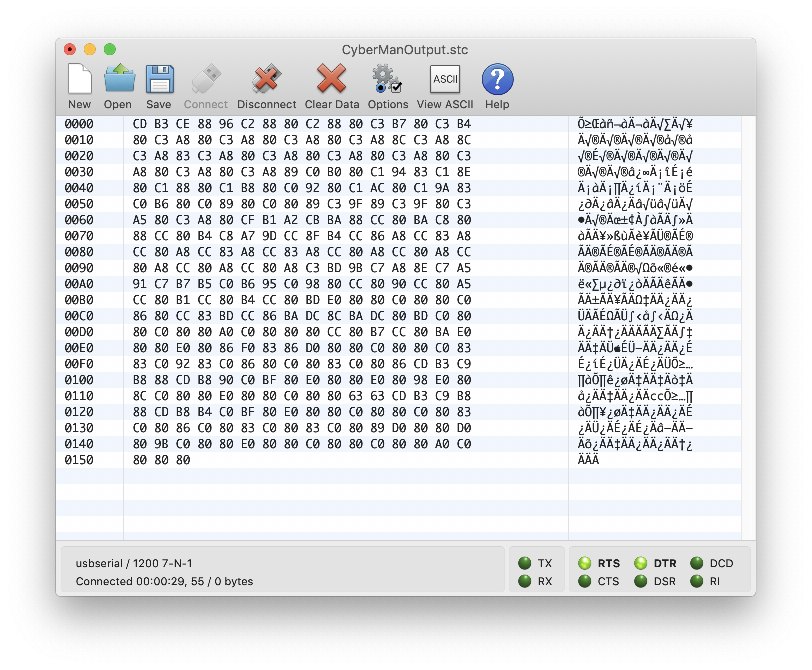
None of the data from Parley or screen was very intelligible, but it did prove that the device worked to some degree. I switched over to CoolTerm, which does have the option to set the baudrate all the way down to 300 baud. But for the ideal configuration, I set the options for this connection to 1200 baud rate at 7 data bits and 1 stop bit with no parity (1200 7-N-1). The data from the CyberMan now looked like this:
Õ≥…£à»Äæ¿ÄÉ¿Ä܇ÄÄ¿ÄćÄÄ¿ÄćÄÄ¿ÄÄ√ΩÄ√ΩÄ–ÄÄ¿ÄÄ√ΩÄ√ΩÄ¿ÄĆ¿ÄɆ¿ÄÄÄ√ΩÄ–ÄÄ¿
ÄÄ√ΩÄ√¢í¬ó≥¬àõ√üĬóâ¿ÄÉ¿ÄÜ√∑ï√ΩÉÃå®ÃòäðÅúÑÕÖçÕ∏Ñ¿ºÄÕ∏¥¡∏Ä¡îÄ¿òòƒòëƒò∏ƒò؃ò∏¿Ä
í«¥ó∆àã√¥Ä¬à°¬æĬàÉ√ÅÄŒàΩ¬£Äœüñœ®¥œ®ÑÀ®≤œ®çÃ屡¨Ä¿ºÄ¿ºÄ¡∏Ä¿ÉÄ¡∏Ä¡¶Ä¿™Ä¿™Ä¡ÖÄ¿ïÄ
¿òÄ¿òÄ¿òÄ¿òÄ¿òÄ¿òÄ¿òÄ¿òÄ¿òÄ¿òÄ¿òÄ√ΩÄ√äĬµÄ¬óÜ∆àé¬ØÄ«äà¿™ò¡¶Ü¿ßÄ¿èÄ¿ÉÄ¿Äõ√Ωõ√Ωπ√
∑ò√∑Ü¿Äò¿Äò¿Äò√Ωò¿Äò¿Äò¿Äò¿Äò¿Äò¿Äò¿ÄòÃÄ∫»Ä©»ÄµÃÄÅ»Ä∏ÃÄ¥ÃÄΩœΩΩ¬¶ÄŒà∫¬àĬØÄ√¥Ä√Ω
Ä√ΩÄ√∑Ä√®Ä√®Äœ®Ω√®Ä√®Ä√®Ä√®Ä√®Ä¡ÇÄ¡ùÄ¡∏Ä¡ãÄ¡∏Ä¡∏Ä¿ïÄ¿πÄ¿ÉÄ√∑Ĭ†Ä¬àĬ¶Ä à†¬∏Ä óàÃ
ÄÑÀ´àÃÄüÃÉ®Õ֮ú®Õé®Õ∏®Õ∏®Õ∏®¿øÄ≈îã¿ò™¿òøƒòÖƒò∏«¢£∆éù¬àø¬î⬪ĬæĬ¨ÄŒ¨´œáñœ¥úœΩú
»ÉØÃò∑Õó∑ÕîçÃ≥Ω¿ÄÜ¿ÄÉ¿Äâ¿ÄÉ√±Ä√¥Ä√ΩÄÃÄ∫ÃÄäÃâ±ÃÜ∫ÃÄ∫œ∑ΩÃÄΩ√ΩÄ
CoolTerm has an option to convert the garbled ASCII output into hex codes, which is far more manageable to dissect the data coming from various commands sent by the CyberMan. All further data mentioned in this article will be either hex values (C0) or binary (1100 0000).
Serial Mouse Protocol
Before delving too deeply into CyberMan's technical details, let's inspect how the Microsoft serial mouse protocol works, which is the basis for how Logitech mice also worked. These details are from the original archived article by Tomi Engdahl <then@delta.hut.fi>, which is the basis for numerous other documents found on the internet.
Packet Format

        D7      D6      D5      D4      D3      D2      D1      D0
Byte 1  X       1       LB      RB      Y7      Y6      X7      X6
Byte 2  X       0       X5      X4      X3      X2      X1      X0
Byte 3  X       0       Y5      Y4      Y3      Y2      Y1      Y0

LB is the state of the left button (1 means pressed down)
RB is the state of the right button (1 means pressed down)
X7-X0 movement in X direction since last packet (signed byte)
Y7-Y0 movement in Y direction since last packet (signed byte)

               1st byte        2nd byte         3rd byte
          ================  ===============  ================
           - 1 ? ? Y Y X X  - 0 X X X X X X  - 0 Y Y Y Y Y Y
          ================  ===============  ================
               | | \ / \ /      \---------/      \---------/
               | |  |   |            |                |
               | |  |   \----\       |                |
               | |  \--------|-------|--------\       |
               | |          / \ /---------\  / \ /---------\
               | |         ================ =================
               | |          0 0 0 0 0 0 0 0  0 0 0 0 0 0 0 0
 Left Button --/ |         ================ =================
Right Button ----/            X increment      Y increment
Each time the mouse state changes (e.g. the mouse moves or buttons are pressed/released), a data packet is sent to the host. Each data packet is comprised of three 7-bit bytes. In the data culled from the CyberMan, each byte is made up of 8 bits, but the leading bit is always set to 1, but it is ignored, so an "empty" byte will still be 0x80 (1000 0000 in binary). An example data packet of the left mouse button being pressed would be E0 80 80 .
Note: The bit marked with X is 0 if the mouse received with 7 databits and 2 stop bits format. It is also possible to use 8 databits and 1 stop bit format for receiving. In this case, X gets the value 1. The safest thing to get everything working is to use 7 databits and 1 stopbit when receiving mouse information (and if you are making a mouse then send out 7 databits and 2 stop bits).
The byte marked with 1 is sent first, then the others. The bit D6 in the first byte is used for synchronizing the software to mouse packets if it goes out of sync.
According to this description of the PC mouse by Petr Simandl, D7 and D6 of Byte 1 will always be 1. This corresponds to the CyberMan output where the first byte in the data packet is at least 0xC0 (1100 0000). Having the D6 bit set to 1 indicates the start of a new data packet, so any subsequent byte in the packet will not have the D6 bit set.
Examples of the first byte of a data packet, dependent upon various button states:
No buttons down:   0XC0 = 1100 0000
Left button down:  0xE0 = 1110 0000
Right button down: 0xD0 = 1101 0000
From the Serial Mouse Detection documentation:
The following is the data report format. Data is transmitted serially (LSB first) in the form of seven bit bytes. X and Y data are incremental movements with Y movement considered positive to the south. (For the PS/2 data format, Y movement was considered positive to the north). The data packet format is three or four bytes long. The fourth byte is transmitted in either of the following cases
a. The middle button is depressed
b. A report is sent while the middle button is depressed
c. The middle button is released
Additional details from Logitech Logimouse C7 Firmware Rev 3.0 Jan86 corroborates the original details on the serial mouse data format:
LOGIMOUSE C7

12.2 Microsoft. Compatible Data Format

In the Microsoft Compatible Format, data is transferred in
the form of seven bit bytes. Each report consists of three
bytes. X and Y are relative movements. In the Microsoft
Compatible Format, Y movement is positive to the south and
negative to the north.

The command to select the Microsoft Compatible Format is 'V'
(56H) .

6  5  4  3  2  1  0  Bit number
1  L  R  Y7 Y6 X7 X6 Byte 1
0  X5 X4 X3 X2 XI X0 Byte 2
0  Y5 Y4 Y3 Y2 Yl Y0 Byte 3

L,R   = Key data (Left, Right key) 1 = key depressed
X0-X7 = X distance 8 bit two's complement value -128 to +127
Y0-Y7 = Y distance 8 bit two's complement value -128 to +127
        Positive = South

If LOGIMOUSE C7 is set by jumpers to the Microsoft
Compatible Format, at power-up it will send one character
'M' (4DH) . No character is sent if the Microsoft Compatible
Format is selected with a command.

LOGIMOUSE C7-M always sends 'M' (4DH) when the host toggles
the RTS signal line. In response to a Microsoft driver reset
(i.e. toggling RTS), LOGIMOUSE C7-M sets up its operating
parameters to Microsoft compatible format, Incremental
Stream, continuous reports, 1200 baud, regardless of the
current settings or the jumpers.
3 Button Logitech Protocol Extension
These three different
pages detail how Logitech extended the Microsoft mouse protocol to support a third mouse button.
Logitech uses this same protocol in their mice (for example Logitech Pilot mouse and others). The original protocol supports only two buttons, but Logitech has added a third button to some of their mouse models. To make this possible Logitech has made one extension to the protocol.
Logitech extended the 2 button mouse protocol to support 3 button mice by adding a 4th byte when the middle button is pressed (and the first packet after it is released). If a 4th byte is encountered (i.e., an
extra byte with D6 set to 0) then D5 of that byte (0x20 or 32 in decimal) indicates the status of the middle mouse button.
Logitech serial 3-button mice use a different extension of the Microsoft protocol: when the middle button is up, the above 3-byte packet is sent. When the middle button is down a 4-byte packet is sent, where the 4th byte has value 0x20 (or at least has the 0x20 bit set). In particular, a press of the middle button is reported as 0,0,0,0x20 when no other buttons are down.
I have not seen any documentation about the exact documents, but here is what I have found out: The information of the third button state is sent using one extra byte which is send after the normal packet when needed. Value 32 (dec) is sent every time when the center button is pressed down. It is also sent every time with the data packet when center button is kept down and the mouse data packet is sent for other reasons. When the center button is released, the mouse sends the normal data packet followed by data byte which has value 0 (dec).
This looks very much in line with what is seen in the section below when pressing the middle button sends four bytes (e.g. C0 80 80 A0), whereas any other action sends three bytes. This is an interesting method to implement the middle button by adding an additional byte. According to the documentation above, the D5 bit is set, so the byte will have the value of 0x20 (0010 0000). Since each of these bytes in the data packet have the first bit always set to 1, the returned value is A0 (1010 0000, which is 0x80 + 0x20). The computer determines when a new data packet comes in by checking if the D6 bit is set to 1. Other mouse protocols ended up using more bytes per data packet to deliver additional data.
CyberMan Hex Codes
The CyberMan's controls are more akin to a joystick than a typical mouse by supporting the movement of the controller for yaw, roll, pitch, and also along the Z-axis. The following are the responses from the CyberMan when each of its controls are activated.
Buttons:
Left button down:	E0 80 80
Left button up:		C0 80 80
Middle button down:	C0 80 80 A0
Middle button up:	C0 80 80 80
Right button down:	D0 80 80
Right button up:	C0 80 80

L+R buttons down: 	F0 80 80
L+M buttons down: 	E0 80 80 A0
M+R buttons down: 	D0 80 80 A0
L+M+R buttons down:	F0 80 80 A0

X-Y Axes:
Left:			C3 A8 80
Right:			C0 98 80
Forward:		CC 80 A8
Backwards:		C0 80 98

Forward-Left:		CF A8 A8
Forward-Right:		CC 98 A8
Backwards-Left:		C3 A8 98
Backwards-Right:	C0 98 98

Z-Axis:
Up:			CC 80 BD
Down:			C3 BD 80

Yaw:
Rotating-Left:		C0 86 80
Rotating-Right:		C3 BD 80 (Note: Same value as Down, one of these are likely incorrect)

Roll:
Right:			C3 BD 80
Left:			C0 8F 80

Pitch:
Forward:		C0 80 8F
Back:			CC 80 BD
These are the approximate values I could get from the output. The data for the three buttons and moving along the X-Y plane are consistent, but the other data seems far more chaotic.
The first byte of each data packet is at least C0 (1100 0000), indicated by the D6 (second from left) bit being set. Most of the data packets are three bytes, unless the middle button is pressed, which then increases each packet to four bytes.
C0 = 1100 0000 : No buttons down
E0 = 1110 0000 : Left mouse button down
D0 = 1101 0000 : Right mouse button down
F0 = 1111 0000 : Both left and right buttons down
As shown in the Packet Format diagram, if the D5 bit (third from the left) is set in the first byte, it indicates that the left button is pressed. If the D4 bit (fourth from the left) is set, then the right mouse button is pressed. If the first byte is F0, then it indicates that both the left and right buttons are pressed, so the D5 and D4 bits are set.
As mentioned in the 3 Button Logitech Protocol Extension section, the middle button is indicated by the addition of a fourth byte. When the middle button is pressed, the A0 is the extra byte. When the middle button is released, an extra 80 is available to indicate that the middle button is no longer active.
Middle button down:	C0 80 80 A0
Middle button up:	C0 80 80 80
This fourth byte will only appear when the middle button is active or the middle button has just been released. This adds a little extra complexity to the mouse driver, because it cannot always assume that each data packet is going to be exactly three bytes in length. Instead, the driver needs to check if the D6 bit on a byte is set to determine the start of a new data packet. Notice that the fourth byte is given a value of A0, which is 1010 0000 in binary, and the D6 bit is 0. When the middle button is released, the fourth byte returns to an "empty" state of 80.
Calculating the X and Y positions is interesting by the way it takes two bits from the first byte, and then combines it with the last six bits of either the third or fourth bits.
Left:		C3 A8 80 (11000011 10101000 10000000)
Right:		C0 98 80 (11000000 10011000 10000000)
Forward:	CC 80 A8 (11001100 10000000 10101000)
Backwards:	C0 80 98 (11000000 10000000 10011000)
The X (left and right) coordinates take the last two bits (D1 and D0) from the first byte and combine it with the last six bits from the second byte. For the Y coordinates, it takes the third and fourth (D3 and D2) bits from the first byte and then merges those with the last six bits of the third byte.
Left:      11101000 => E8
Right:     00011000 => 18
Forward:   11101000 => E8
Backwards: 00011000 => 18
It's interesting to see when the max values of each direction are constructed, that both Left and Forward equal E8, and Right and Backwards equal 18.
Now that we have covered the basic operations, let's combine them and inspect the output. Moving the CyberMan Forward and Left will return CF A8 A8, and holding down the left mouse button at the same time will return EF A8 A8.
Forward-Left:		CF A8 A8 (CC 80 A8 | C3 A8 80 => CF A8 A8)
Forward-Right:		CC 98 A8 (CC 80 A8 | C0 98 80 => CC 98 A8)
Backwards-Left:		C3 A8 98 (C0 80 98 | C3 A8 80 => C3 A8 98)
Backwards-Right:	C0 98 98 (C0 80 98 | C0 98 80 => C0 98 98)
There is a computational beauty of how the various input values are calculated, which uses the bitwise OR operator
(indicated by the vertical pipe character: |). If both the left and right mouse buttons are down at the same time, then the resulting data packet is F0 80 80, which is calculated by E0 | D0 => F0.
   1110 0000 (E0)
OR 1101 0000 (D0)
------------
   1111 0000 (F0)
If the mouse is set to Backwards-Left and the middle button is pressed down, the data packet C3 A8 98 A0 is sent. Once the middle button is released (but the mouse isn't moved from its position), the data packet C3 A8 98 80 is sent once and then the standard three byte data packet C3 A8 98 is afterwards.
It appears that the X-Y values for the 2nd and 3rd bytes have a range between A8 (1010 1000) and 98 (1001 1000), which leaves room for the CyberMan to handle the extra functionality for the Z-axis, yaw, pitch, and roll. The values I saw in the terminal were not as consistent, but it appears that any extra values were either higher (BD) or lower (8F).
This covers traditional mouse functionality, but what set the CyberMan apart from its traditional counterparts is its ability to work in three dimensions. Additional details per the Logitech CyberMan's manual:
- Using Z: Pull up and push down lightly on CyberMan to use the Z movement. In a game, you might use the Z movement to jump up or crouch down.
- Using Yaw: Twist CyberMan slightly to the left or right to use the Yaw movement. Looking right or left are typical Yaw actions in 3D games.
- Using Roll: Tilt CyberMan gently to the right or left to use the Roll movement. In some games, use Roll to move left or right.
- Using Pitch: Incline CyberMan slightly forward or slightly backward to use the Pitch movement. In your 3D games, pitching simulates actions like looking up or down. Some games use Pitch to walk forward.
Looking at how the Z-axis is handled, it initially looks like it is moving Forward (CC) when going Up, but the third byte is BD, which is larger than a normal Forward value can achieve. There is a similar approach when pressing the mouse Down. The first byte is C3, which looks like the mouse is moving left, but the second byte is BD, which indicates it is not within the standard range of moving along the X-axis. When releasing from the Up position, a data packet of C0 80 83 is sent.
Up:	CC 80 BD
Down:	C3 BD 80
The Yaw, Roll, and Pitch follow similar approaches of communication by using a mixture of values between the three bytes to indicate what type of data is being sent. Yaw and Roll make use of the second byte, whereas Pitch uses the third byte. The data I'm seeing is inconsistent, so take some of these examples with a grain of salt, and this will require further testing to get more reliable results, or my CyberMan may not be 100% functional.
Conclusion
The Logitech CyberMan 3D Controller was an interesting PC peripheral that was a little ahead of its time. It was followed up by the Logitech CyberMan 2 a couple years later, which sported a different form factor, likely to address the ergonomic difficulties the original possessed, but the second model didn't set the world on fire, either.
This has been an interesting experiment to delve into the ancient world of serial mice and odd peripherals, one which I intend on further pursuing to see if I can get the CyberMan to successfully work on modern computers and try out some of the supported games.
References
9th December 2021 | Programming
When setting up a new Mac running macOS Big Sur, I tried to open a BBEdit Clipping that was transferred via AirDrop, which resulted in this error:
"Current Date" cannot be opened because it is from an unidentified developer.
macOS cannot verify that this app is free from malware.
Durenor sent you this file on November 17, 2021.
Then that error was followed by another delightful error:
The application "BBEdit.app" can't be opened.
-128
Interestingly enough, it was possible to open these Clippings from the command line text editor pico. When I installed the BBEdit command line tools, I was also able to open the Clipping with the command bbedit Current\ Date. But trying to open the file from Finder did not work.
Right-clicking and selecting Open should work as a work around, similar to how to open unidentified apps. I figured this was an issue with the files being quarantined, so I looked for the command line solution.
How to check if a file is quarantined using the Terminal by using the xattr command:
Clippings % xattr Current\ Date
com.apple.LaunchServices.OpenWith
com.apple.TextEncoding
com.apple.quarantine
To remove the quarantine tag, use the xattr -d com.apple.quarantine command on the quarantined file.
% xattr -d com.apple.quarantine Current\ Date
Then check again to verify that com.apple.quarantine has been removed.
% xattr Current\ Date
com.apple.LaunchServices.OpenWith
com.apple.TextEncoding
com.apple.lastuseddate#PS
References
19th October 2021 | Games
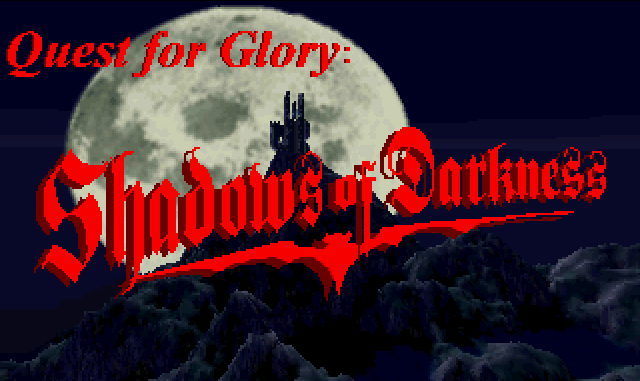
It's October, which means it is time to play some Quest for Glory: Shadows of Darkness! I've played this game numerous times over the past 25 years, and I still occasionally find new things, but this year I decided something different by playing both the floppy disk and CD versions of the game. This game was initially released in 1993, but it was rushed out to make the holiday season and was notoriously buggy. The CD version of the game followed a year later which included voice acting, in addition to many bug fixes.
I played through both the floppy disk and CD versions to look for differences between the two, in addition to various bugs (what is this — a bug hunt?). I was able to get through most of the floppy disk version, but when I returned to the Dark One's cave, it got stuck and acted like the hero kept trying to leave the cave instead of entering it. Unfortunate, but close enough for horseshoes and hand grenades to compare these two versions of Quest for Glory 4.
Floppy
- Logitech CyberMan 3D Controller support
- Igor pounding on the headstone in town makes no sound
- Magda's lips don't move while talking.
- When talking with Davy and Magda, when talking with Davy, it goes to his close up portrait instead of him talking in the view with himself and Magda.
- Playing this game under ScummVM seems to resolve a lot of the speed issues. Did not encounter Error 47 or 52. Had no issues with the game locking up after fighting a wraith. Battles move fairly normally, especially when fighting the Badders. The stamina does not fully reload like there has been with speed issues. The CD version under ScummVM (and the NewRisingSun patch) still moves too quickly.
- In this version, one can see Frankie wave between Dr. Cranium talking. In the CD version, it flips so quickly you can't see it.
- Nikolai's portrait as a ghost looks the same as when he is alive. In the CD version, his ghost portrait is bluish.
- When first talking with Boris, mentioned that Olga has the same last name and Boris says that it is an interesting coincidence. I wasn't able to get this dialog to appear in the CD version.
- Elderberry bush does not show eyes until it is hit.
- [BUG] Bug found after first talking with Baba Yaga, she sends the hero out (no animation), but the game does not act like they spoke about the pie. Talking to Bonehead gives no clues about how to make the pie.
- [BUG] A couple areas where it does not display the proper window when a person is talking. Instead it shows the narrator's window.
- [BUG] After finishing a fight, the victory chime gets cut off, except when I fought the Badders in the castle and the entire chime played there.
- [BUG] When opening Ligeia's tomb at night, it said that her ghost was coming out and was MAD, but no wraith battle happened. When opening the tomb again, the game acts like the wraith had already been vanquished.
- [BUG] After Katrina leaves near the castle, you can still click the Mouth icon on yourself and she will respond to the options.
- [BUG] When Katrina walked away near the castle, her sprite just slid backwards.
- [BUG] Upon entering the Dark One's cave again, it seems to be stuck as if the hero keeps trying to leave.
- [BUG] No animation when trying to climb the tree in the cemetery .
CD
- Voice acting
- Bug fixes
- Opens with the Sierra splash logo and mountain animation
- No longer supports the Logitech CyberMan 3D Controller
- Looking at self does not mention the character's name. This small change might have been made in case there would be voice narration for that line (there wasn't).
- The CD version under ScummVM does not seem to play the battles at the "expected" speed, so there's still the stamina issue and the fights are faster than intended. This is one area where the floppy disk version was better.
- [BUG] No voice track when telling the magic bushes to grow and prosper.
- [BUG] When telling Bonehead about the gnome, the "fry guys" and "the Big B", there are three dialog messages with no voice dialog.
- [BUG] The second half of Dr. Cranium's "Report" dialog is voiced by John Rhys-Davies, but it does still show the portrait view.
- [BUG] One of the last lines the Gnome says when talking to him after his final performance are lines done by John Rhys-Davies instead of by Punny Bones.
- [BUG] It is possible to skip fighting the battle with the last Borgov (Priest Horror) to get the last rite. Even without the rite, the game will play properly.
Other
- Noticed that one can oil their weapon and armor. It doesn't seem to do anything, but it is a nice touch.
- At least for the fighter, it is possible to force open the gate, fight the two Necrotaurs, then enter the castle from the front. This seems reminiscent of trying to enter the Brigands' hideout via the front door in Quest for Glory I (versus taking the secret path).
- Tried giving candy and flowers to everyone. Most people have a response to candy. Some people (such as Tanya and Katrina) might have multiple responses. Some characters also have interesting responses when given an avocado and garlic sandwich.
- [BUG] The axe icon does not display in the inventory.
- [BUG] The tombstone disappears from the graveyard at night.
- [BUG] There are a couple of description inconsistencies with what is seen on the screen versus what looking describes.
- [POSSIBLE BUG] As a fighter (floppy), it was possible to get the Black Bird in the monastery. In the CD version as Paladin, the Black Bird was not there. A bug or a difference between the Fighter and Paladin classes?
Going through these two versions of this game shows the importance of proper testing and how much effort goes into creating a game. While the floppy disk version was mostly playable until the end, it was interesting to come across areas which were buggy, missing animations, or were changed for the CD version. The update did clean up a number of issues, but even still there were a number of misses (such as missing or incorrect voice tracks). What wasn't expected several years after the game's release would be speed-related bugs that would plague many of the early 90s Sierra games. Fortunately modern utilities like DOSBox, ScummVM, and the NewRisingSun patch help immensely to curtail the worst of the issues and make this game a joy to experience over and over again.
18th October 2021 | Games
Quest for Glory: Shadows of Darkness (QFG4) is no stranger to bugs. Errors 47 and 52 drive more fear into gamers' hearts than all of the undead creatures featured in this horror-infused game. The original version of the game had been rushed out far too early to meet the impending holiday deadline, which resulted in a very buggy game. I recently tried playing through the floppy disk version of QFG4 and got most of the way through until the game got stuck near the end upon returning to the Dark One's cave. The CD version of the game fixed a number of bugs, added some polish, and included the excellent voice acting, which makes the game feel barren without it.
Yet, even with these improvements, there remained a number of bugs, some which were only unearthed later as computers got faster. Many Sierra games from the early 90s were similarly afflicted by speed-related issues, which required utilities like Turbo or MoSlo to try and slow down the computer so the game would run properly. The indispensable NewRisingSun patch has been an incredible blessing to fix many of the most egregious issues in QFG4. When I first played this game, I encountered both Errors 47 and 52 within the first hour of game play. Fortunately, with the NRS patch, I haven't seen either of these errors for many years when I play the game under DOSBox.
Unfortunately, I have come across a random bug (that others have also noticed) when after fighting a wraith at its burial mound, the game would essentially lock up. One can see the drop down menu, but pretty much everything except the Settings menu is greyed out. In the margins of one of my maps I had scribbled down this note about this issue:
"When fighting wraiths, wait until it appears before fighting it. Otherwise, the game will freeze after the fight."
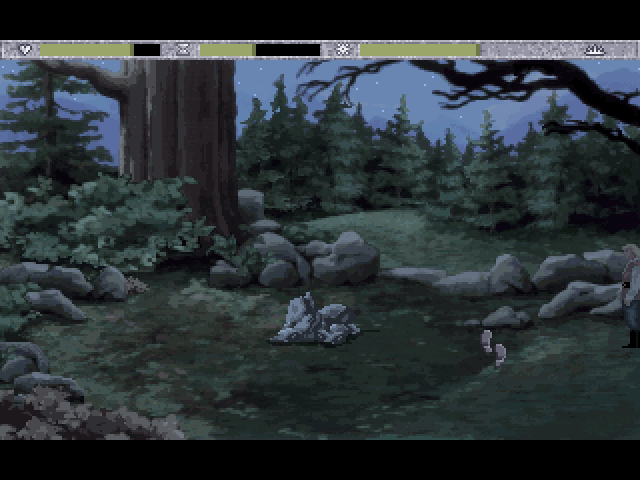
I found that this issue was somewhat random at times. Sometimes I would go into a screen with a wraith and have no problem triggering the wraith to appear. Other times the wraith would be a no-show. The key is to look for the red dot floating around the burial mound. If you don't see it immediately, then leave the screen and return at another time. But once the floating red dot is visible, approach the mound and wait until the wraith fully appears before initiating combat.
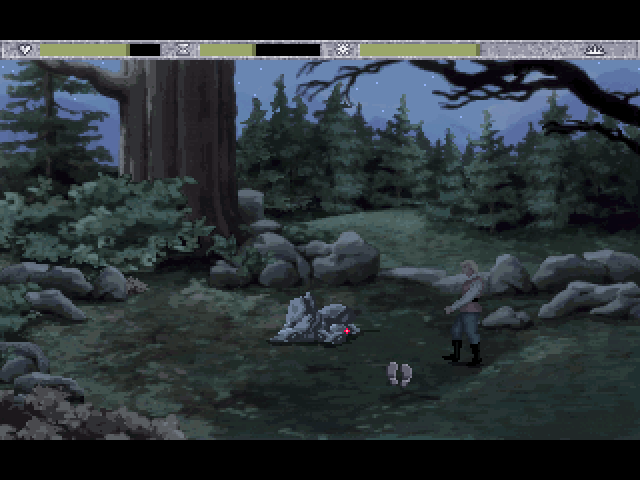
I never encountered this particular problem with the floppy disk version of QFG4, so this particular bug might be a side effect of the NRS patch.
Another post recommends removing the wraith patch files 53.SCR and 53.HEP from the PATCHES folder. These patches fix the wraith draining health bug, but might also be causing this occasional issue, as well. A temporary work around is remove the two 53 files, fight the five wraiths at their burial mounds, then replace the two patch files. Otherwise, just return to the mounds if the wraith doesn't appear immediately.
And as always, check out Sierra Help for numerous other tips and patches to resolve various issues in Quest for Glory 4 and other Sierra games.
18th September 2021 | Programming
As far back as 2005, I was looking at adding support for NSServices to Permanent Eraser. However, due to poor design decisions, it was not possible to implement them due to timing issues. With Snow Leopard's improved support for NSServices, I created a plug-in service to allow a user to right-click on a file and be able to erase it with Permanent Eraser.
With the intended successor to Permanent Eraser 2, I have been experimenting with adding support for NSServices. NSServices have been around for a long time, so the available information is somewhat jumbled, especially with some additions which were added with Mac OS X 10.5.
Info.plist
The first step is to add NSServices key-value pair the Info.plist. Below is a simple example to configure a single service.
<key>NSServices</key>
<array>
	<dict>
		<key>NSMenuItem</key>
		<dict>
			<key>default</key>
			<string>Service Menu Title</string>
		</dict>
		<key>NSMessage</key>
		<string>doSomeStuffMethodName</string>
		<key>NSPortName</key>
		<string>SomeApp</string>
		<key>NSRequiredContext</key>
		<dict/>
		<key>NSSendFileTypes</key>
		<array>
			<string>public.item</string>
		</array>
	</dict>
</array>
Here is another example with some excellent comments on what the various keys represent.
<key>NSServices</key>
<array>
    <dict>
        <key>NSMenuItem</key>
        <dict>
            <key>default</key>
            <string>Folder Handling Demo</string>
        </dict>
        <key>NSMessage</key>
        <string>handleServices</string> <!-- This specifies the selector -->
        <key>NSPortName</key>
        <string>Tmp</string>       <!-- This is the name of the app -->

        <!-- Here we're limiting where the service will appear. -->
        <key>NSRequiredContext</key>
        <dict>
            <key>NSTextContent</key>
            <string>FilePath</string>
        </dict>
        <!-- This service is only really useful from the Finder. So
         we want the finder only to send us the URI "public.directory"
         which *will* include packages (on the off-chance you want to
         see the full package directory name) -->
        <key>NSSendFileTypes</key>
        <array>
            <!-- Check out "System-Declared Uniform Type Identifiers"
             in the Apple documentation for the various UTI types.
             In this example, all we want is a directory, which is
             a super-type to other types (e.g. public.folder) -->
            <string>public.folder</string>
        </array>
    </dict>
</array>
For Permanent Eraser, I have a more complex version set up.
<key>NSServices</key>
<array>
	<dict>
		<key>NSKeyEquivalent</key>
		<dict>
			<key>default</key>
			<string>E</string>
		</dict>
		<key>NSMenuItem</key>
		<dict>
			<key>default</key>
			<string>Erase File</string>
		</dict>
		<key>NSMessage</key>
		<string>eraseService</string>
		<key>NSPortName</key>
		<string>Permanent Eraser</string>
		<key>NSRequiredContext</key>
		<dict>
			<key>NSTextContent</key>
			<array>
				<string>FilePath</string>
			</array>
		</dict>
		<!--
		<key>NSSendFileTypes</key>
		<array>
			<string>public.file-url</string>
			<string>public.url</string>
			<string>public.item</string>
			<string>public.folder</string>
		</array>
		-->
		<key>NSSendTypes</key>
		<array>
			<string>NSStringPboardType</string>
			<string>NSURLPboardType</string>
			<string>public.utf8-plain-text</string>
			<string>public.url</string>
			<string>public.file-url</string>
		</array>
	</dict>
</array>
Commented out is the NSSendFileTypes key-value pair, which is similar in its functionality to NSSendTypes. According to the Services Implementation Guide the primary difference is that NSSendFileTypes only accepts Uniform Type Identifiers (UTIs), whereas NSSendTypes can accept the older style pasteboard types (e.g. NSStringPboardType, NSURLPboardType) and UTIs.
To localize strings for keys like NSMenuItem and NSServiceDescription, create a ServicesMenu.strings file with the translated strings. If a string (such as for NSServiceDescription) is particularly long, use a shorter token like SERVICE_DESCRIPTION for the key in the strings file.
The Code
From the AppDelegate's applicationDidFinishLaunching method, I call the following setupServiceProvider() method, which creates an instance of the ContextualMenuServiceProvider class and then calls NSUpdateDynamicServices() to dynamically refresh any new services.
func setupServiceProvider() {
	NSApplication.shared.servicesProvider = ContextualMenuServiceProvider()
	// Call this for sanity's sake to refresh the known services
	NSUpdateDynamicServices()
}
The ContextualMenuServiceProvider.swift file:
import Foundation
import Cocoa

class ContextualMenuServiceProvider: NSObject {

	@objc func eraseService(_ pasteboard: NSPasteboard, userData: String?, error: AutoreleasingUnsafeMutablePointer <NSString>) {

		// Just for reference, looking at the number of available pasteboard types
		if let pBoardTypes = pasteboard.types {
			NSLog("Number of pasteboard types: \(pBoardTypes.count)")
			NSLog("Pasteboard Types: \(pBoardTypes)")
		}

		// NSFilenamesPboardType is unavailable in Swift, use NSPasteboard.PasteboardType.fileURL
		guard let pboardInfo = pasteboard.string(forType: NSPasteboard.PasteboardType.fileURL) else {
			NSLog("Could not find an appropriate pasteboard type")
			return
		}

		let urlPath = URL(fileURLWithPath: pboardInfo)
		let standardizedURL = URL(fileURLWithPath: pboardInfo).standardized
		let messageText = "Hola info \(pboardInfo) of type \(pboardInfoType) at \(urlPath.absoluteURL) with standardized URL \(standardizedURL)"
		NSLog(messageText)
	}
}
File System Path Types
For Permanent Eraser, I need to get the path for the selected file. When parsing out the returned file path from the pasteboard info, it returned an unintelligible path like:
file:///.file/id=6571367.8622082855 . This is certainly not what I was expecting and resulted in some confusion until I learned more about the various methods that macOS can represent a file's path. What I was receiving here was a file reference URL. The advantage of this type is that it can point to the same file, even if the original file is moved (somewhat similar to how a Mac alias can still point to the correct file even if it is relocated). However, what I wanted was a path-based URL, which is easier for me to read and work with.
For most URLs, you build the URL by concatenating directory and file names together using the appropriate NSURL methods until you have the path to the item. A URL built in that way is referred to as a path-based URL because it stores the names needed to traverse the directory hierarchy to locate the item. (You also build string-based paths by concatenating directory and file-names together, with the results stored in a slightly different format than that used by the NSURL class.) In addition to path-based URLs, you can also create a file reference URL, which identifies the location of the file or directory using a unique ID.
All of the following entries are valid references to a file called MyFile.txt in a user’s Documents directory:
Path-based URL: file://localhost/Users/steve/Documents/MyFile.txt
File reference URL: file:///.file/id=6571367.2773272/
String-based path: /Users/steve/Documents/MyFile.txt
There are several ways to convert the file reference URL to a more readable format. Using a quick AppleScript from the Terminal, one can get the string-based path this way:
osascript -e 'get posix path of posix file "file:///.file/id=6571367.4833330"'
In Swift the conversion to a path-based URL is like:
let standardizedURL = URL(fileURLWithPath: pboardInfoFileURL).standardized
Testing
To test if your new service works, copy the application into the Applications folder and then launch your app to ensure that the system recognizes the new service. The NSUpdateDynamicServices() call is used to help refresh the system. However if it appears that macOS is not updating properly, then try running the following commands from the Terminal:
/System/Library/CoreServices/pbs -flush
To list the registered services, use pbs with the -dump_pboard option.
/System/Library/CoreServices/pbs -dump_pboard
References
18th June 2021 | Writing
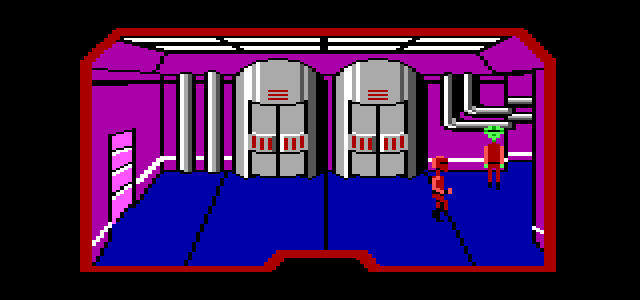
This piece of poor prose is inspired by an idea posed by the Space Quest Historian: What was the Sarien guard doing who was standing outside the laundry room on the Deltaur?
Another day, another buckazoid...
Fooblat licked his lips again, mostly out of boredom, but also because they were so dry. The Deltaur's air circulation system pushing around stale air through the ship didn't much help either.
Not seeing anyone else in the hallway, the Sarien dared to remove his hand from his holstered Pulseray and patted around his pockets for any Bert's Labion Bees lip balm...nothing. The only thing he had in his pocket was a badge displaying his name and the desultory word "Temp" in bright red letters. As one of the "inferior" Red Badges, he fully expected the full-time Blue Badge employees to spit on him first before bothering to talk to him. He was only here because he needed the money. The temp job was almost up, and once they made shore, he was going to hop off this place like a tick leaping off a drowning Hipoglopus.
Standing in front of the Emergency Exit was where he had been stationed today. And it was locked. What in the name of the seven suns was the point of guarding a LOCKED FREAKING DOOR?! Fooblat sighed heavily and then shifted his weight from one leg to another to prevent them from falling asleep. This shift was terminally boring, which had reduced his mind to the consistency of mucus from an Antarean Slime Devil. He couldn't wait for this shift to finish so he could get back to playing some video games.
The door to his right unexpectedly swiped open and another guard exited the laundry room. Fooblat straighted up, doing his best to look alert and professional. He stared straight forward, hoping that the newcomer would ignore him. As one of those "lowly" temps, the regular crew had taken immeasurable delight in teasing and taunting the Red Badges.
"Got a light?" came an unexpected question.
Not expecting the odd question, a flustered Fooblat picked out the first random response swimming around in the non-liquified bits of his brain. "Sorry, don't drink."
The response didn't seem to do anything to deter the newcomer. The other Sarien continued on with a variety of questions and random dialog. Fooblat tried his best to sound disinterested, hoping this annoying visitor would go away.
"Is this the way to the Star Generator?"
"Don't ask me, I just work here," Fooblat responded, trying to be as unhelpful as possible.
Fooblat finally dared to glance at the other Sarien, who was still wearing his helmet indoors. Who was this, anyway? Butston? Loplatz? Who knew, Sariens all looked the same with their helmets on. Still, it piqued his curiosity. "Hey bud, what's with the helmet indoors?"
"Ssshh!" the other guard exclaimed. "I'm hiding from the boss."
"Oh," Fooblat said dimly, futilely trying to grasp this round bit of logic. "That makes sense, I guess."
The mystery guard continued his litany of inane questions. At one point, Fooblat swore the other Sarien was leaning in to kiss him. But with THESE dry lips?! Fortunately nothing came of it besides his startled imagination and more dull conversation. Just as he was about to make good use of the Pulseray to bore an extra orifice into the chatty guard's skull, he was finally asked something interesting.
"Have you played King's Quest III?"
Fooblat's eyes opened wide with delighted surprise. "Yes," he happily responded. "I just bought it last week. It was on sale for 128,000 Buckazoids at Tiny's Holodisk Shop. What a bargain!!!"
Radio Shock had already been sold out of the game, so he was glad he was able to still procure a copy at Tiny's. He tried to engage the guard further about the game, but apparently he had only spent the time doing chores for the evil wizard. Fooblat got an odd impression that this other Sarien secretly enjoyed sweeping and emptying chamber pots.
Eventually, a dull silence uncomfortably wedged itself between them. Fooblat returned to staring at the opposite wall, counting down the microseconds until his shift was over.
"Well," the other guard said, rudely interrupting the blissful silence. "I'm off to find the little boys room."
Fooblat heaved another sigh once the other guard left. If his boss had caught him chatting with another guard, he would have gotten yelled at again. Damn Blue Badges with their smugness and steady paychecks.
His mind returned back to a state of thick, primordial soup, the only singular thought being that of getting back to King's Quest III after his shift. He knew there must be a key for that locked cabinet in the wizard's study — but where?
He checked the time and frowned. It was already past his shift and his replacement hadn't shown up yet. Typical. Never could trust another Sarien to show up on time. This was digging into his precious game time. He frowned again in continued annoyance. This temp job would be done in two days, and then, goodbye Deltaur!
Fooblat frowned for the third time in as many minutes. Still no replacement. Screw it. He was done with his shift. There were plenty of other guards to patrol the ship.
Besides, it's not like anyone was going to use this Emergency Exit...
3rd June 2021 | Edenwaith
A couple of short announcements:
EdenList 2.2.0
A couple months ago, EdenList 2.2.0 for iOS and iPadOS was released. This now includes search functionality to quickly dig through large lists. This particular feature is one of my favorite features ever, and is used nearly every time I use the app. The app has also been tested and verified on iOS/iPadOS 14.
EdenList can be downloaded here free of charge.
The Retirement of 33 RPM
I've mulled numerous times over the past several years on what I plan on doing with 33 RPM, a utility which can change the speed and pitch of music. 33 RPM is highly dependent upon Apple's now-deprecated QuickTime framework, so getting 33 RPM to work on more modern versions of macOS (or even Apple's other platforms like iOS) would require an entire rewrite, which is an arduous task. Most of my time these days has been focused on more games-related endeavors, the occasional update to EdenList, and a slow rewrite of Permanent Eraser.
After more than eight years of inactivity, the time has come to formally retire 33 RPM where it will join the archives of other retired Edenwaith software. I've had a variety of ideas of where to take 33 RPM, but those ideas are best served by more dedicated apps. If you are looking for a good iPhone music player, check out Cs Music Player. For music transcription, there is the awesome Capo for Mac, iPhone, and iPad.
Many of Edenwaith's Mac projects were started in the early days of Mac OS X to fill various niches or to scratch a personal itch of something I wanted to create. 33 RPM is still a useful little (and free) utility for Macs running Mac OS X 10.4 (including PowerPC Macs) through macOS 10.14. That's not a bad run. So long 33 RPM, and thanks for all the fun.
11th April 2021 | Apple

It has been recently announced that the venerable TenFourFox web browser for PowerPC (PPC) Macs was going to cease regular development, which rekindled my interest in playing around with my trusty PowerBook G4, which only gets occasional use if I'm testing a PowerPC version of some of my own software. Such is the way of aging hardware and software: the necessity to support them wanes over time, but it does question how useful can an 18 year old laptop be in 2021. Can it still be useful, or is it relegated to a hobbyist's endeavors?
With the retirement of TenFourFox (and its companion Classilla), I learned about another modernized web browser for PowerPC Macs: Leopard Webkit. TenFourFox is an amazing and much appreciated project to try and bring a modern web browser to PPC systems, but it runs very sluggishly on my PowerBook. Leopard WebKit, however, runs very quickly in comparison and makes browsing the web on a Mac from 2003 feel viable. Leopard WebKit also comes with a number of scripts to help modernize Mac OS X Leopard, including downloading QuickTime 7.7 (my version was slightly older at 7.6.9).
However, TenFourFox has been leveraged to be even more useful with various extensions, add-ons, tips and tricks. FoxBox is useful for for working with specific websites, especially YouTube. There are also a number of other tricks that can optimize the speed of TenFourFox to remove unnecessary overhead with modern web browsing.
One of the things that prevents a PowerPC Mac from being fully useful today is the same thing which hamstrung Classic Mac OS over time — the internet. Trying to keep up with the latest security is an eternal game of cat-and-mouse, and as older systems no longer get the latest certificates and patches, it renders less and less network services available. Even on Mac OS X Snow Leopard, I can no longer work with GitHub, and a number of websites are not accessible. A workaround to some of these limitations is to use the FrogFind search engine, and it makes browsing the Web on an older machine a little more feasible. Not perfect, and still somewhat painful, but possible.
When I look at the Docks on my PowerBook versus my modern iMac, I see many of the same or similar tools: web browsers, Xcode, an SCM utility (Cornerstone, but now Tower), a Terminal, Permanent Eraser, Transmit, DOSBox, Acorn, AGI Studio, BBEdit and TextWrangler. Revisiting this older system has been an interesting task to search for "new" software or just try to update things as much as possible and discovering a couple of interesting gems in the process.
But how useful is this software? For some tasks, they can easily do the job. I still have a license for BBEdit 8 and was able to get a copy of BBEdit 8.2.6 (which is what is currently being using to compose this blog post), Acorn 1.5.5 to create the poster image, and Transmit 5.1.9 to upload to the website. Even a couple of years ago, I used a similar combination of BBEdit Lite 6.1.2 and Transmit 1.7 on Mac OS 9 to update a blog entry.
[Update: 25 April 2021] I've recently been reading up on how to design fonts, and the book I'm reading mentions using Adobe InDesign to make the full use of OpenType fonts. InDesign is a program I haven't had much use for, but a number of years ago, Adobe did provide the full set of Creative Suite 2 products for free from their website after they shut down the activation servers for the these products. These are fairly mature products and can still be quite useful, as long as you have the proper hardware and operating system to run them. There are even active game developers still using Adobe Photoshop CS2 because it does everything they need, evidence that the latest doesn't always equate to the greatest for everyone.
Unfortunately, a cursory search shows that Adobe has taken down the original page which allowed one to download Acrobat 7 and the other CS2 products. Fortunately, there are other options such as using sites like the Wayback Machine, Macintosh Repository, and Macintosh Garden which still have backup copies of these software packages. If you have a PowerPC Mac and need to do some image editing, illustration, or layout design, these apps are still wonderful tools, great if you might need to use them only occasionally and don't want to pay the monthly "Adobe tax" for their Creative Cloud service.
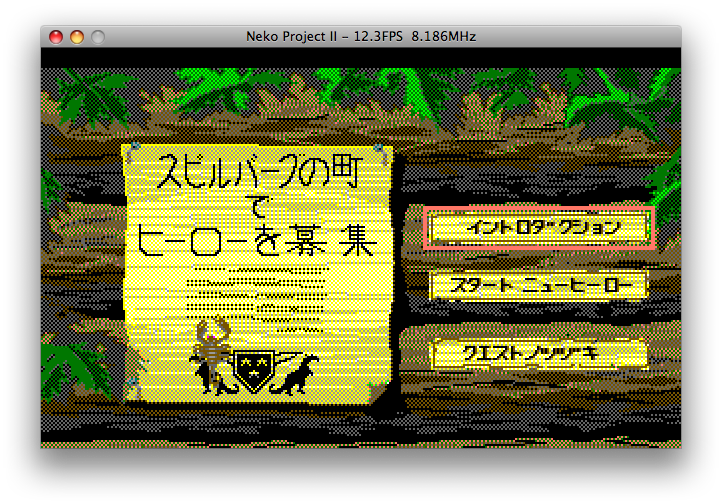
[Update: 6 February 2023] Older machines are a snapshot of their time, but they can prove to be indespensibly useful when using some software that was built for that era. Occasionally, interesting nuggets are unearthed, such as the Carbon version of the Neko Project II PC-98 emulator, which seemed more complete than the more recent versions of that project. Using NP2 Carbon, I was able to play the Japanese version of Quest for Glory I. Alongside DOSBox, these emulators can play plenty of great, retro games (which is also how I play a lot of games on the Mac). While there are more modern apps which can emulate the PC-98, I found NP2 Carbon to be the easiest one to use.
[Update: 22 April 2023]
When in the process of making a screencast of the sound quality of the Japanese version of QFG1 in a PC-98 emulator, I originally tried using QuickTime X in macOS Ventura, but I noticed a major problem in that it was recording audio from the Mac's microphone, which meant it was also picking up external noises (such as typing on the keyboard). This led me down an interesting rabbit hole of trying to record video and audio on a modern Mac, which also involved using other utilities like Soundflower, Loopback, and QuickTime while jumping through additional security hoops to enable them. The easier solution turned out to use older software, such as Ambrosia Software's Snapz Pro X 2. Fortunately, I still had an old license that worked with Snapz Pro 2.2.2 on Mac OS X Leopard. This software worked beautifully to record both the video and audio and create a relatively small video file.
When I was researching how to transfer data between two SD cards for the Nintendo Switch, I came across a new piece of modern software which can run PowerPC, Intel, and Apple Silicon processor: SD Card Formatter. Considering the age of the PowerBook, one must generally rely on older software, so it is quite a treat to find modern software that is still designed to run on PowerPC Macs. This is a particularly interesting case since this is the only app I've seen (so far) which has been built for all three processors. I imagine this involves performing multiple builds and then stitching them together into a single Universal Binary. Well done, Tuxera.
Conclusion
It's been 20 years since the release of Mac OS X, and in many regards, the general usage of this operating system has not changed too much since its debut (certainly not as much as the jump from Mac OS 9 to X). We reached a useful level with our computers years ago as platforms have matured, and additional features have been mostly incremental improvements.
There have been some developers who have supported a platform well past the expected expiration date. Even a number of my own software products such as Permanent Eraser, EdenMath, 33 RPM, and EdenList for Mac (in addition to numerous retired projects) still work on PowerPC Macs. I've done my best to maintain support for PowerPC Macs for many years, but it certainly has become increasingly difficult to be able to support both older and newer systems. With the release of the Apple Silicon Macs, this is even more of a sign that support for PowerPC is only waning even further, and so will Intel Macs over time. And in another 15 years, perhaps we'll be migrating to yet another hardware architecture.
To answer the original question, can PowerPC Macs still be useful? It ultimately depends on what you are trying to do. If you are not heavily reliant upon network services, but have some old utility or game from the PowerPC-era, then they can still be feasible machines. But for modern day-to-day workhorses, they have already been put out to pasture.
Resources

