Edenwaith Blog
4th April 2021 | Games
In the past several years I've written up blog posts which have listed various Easter eggs, glitches, and oddities in old Sierra games. This year is dedicated to all of those fun quirks in the AGI version of King's Quest IV, which comes with several Easter eggs not found in the more commonly played SCI version of the game.
Software Pirates
King's Quest IV was released in 1988 (or as Al Lowe mentioned in an interview, it was specifically released on September 31st), during an era when games were released on floppy disks, which were easily copied by kids and cheapskates. That so many of their games were being pirated was not lost on Sierra. At the start up screen, type ALT + D to get into debug mode and then press ENTER/RETURN a couple of times. At the command prompt, type pirate and one of the following images will appear.
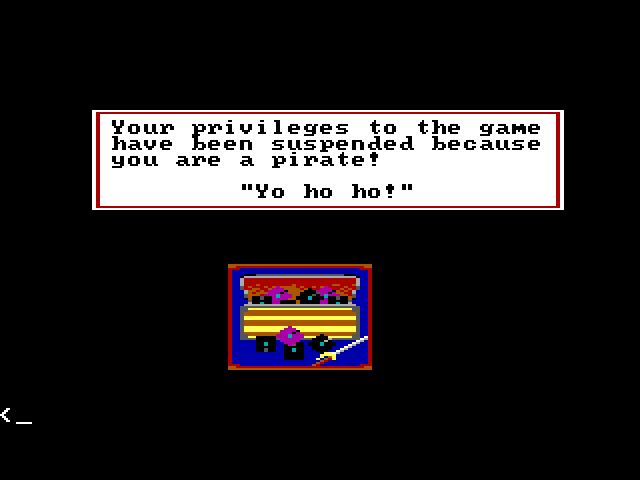
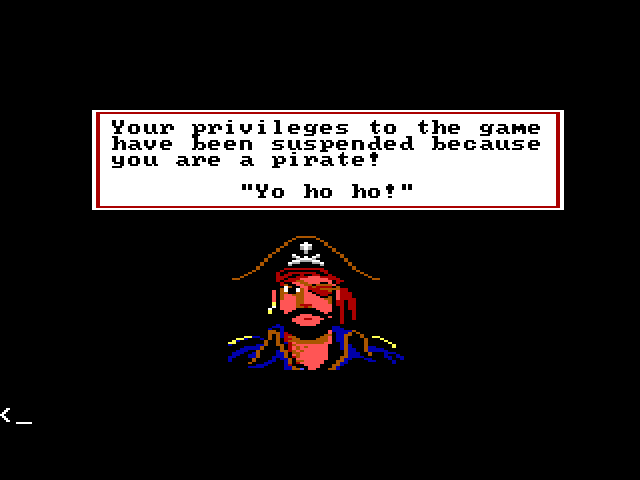
KQ4 Rap
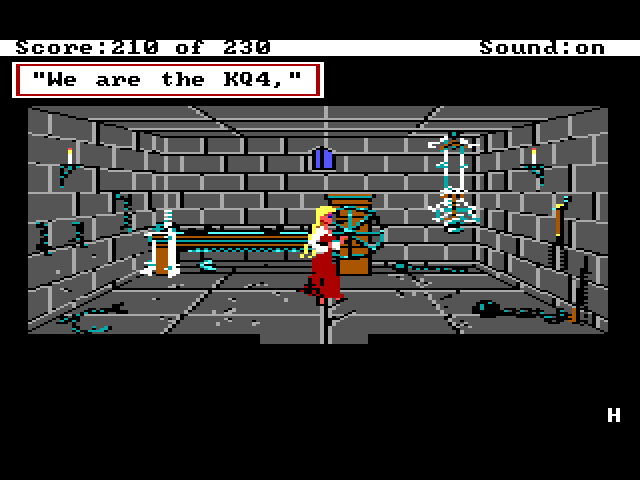
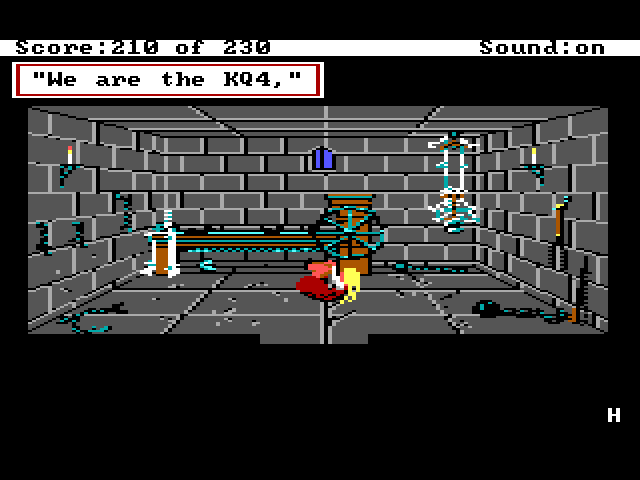
This and "Beam Me" are likely the most well known Easter eggs in the AGI version of KQ4 (which were excluded from the SCI version of the game).
After defeating Lolotte, return to the dungeon cell and type rap kq, in which Rosella will perform some awkward gyrations along to some snarky prose by the exhausted game developers. Making games is tough work, deadlines loom, and Christmas doesn't move.
Beam Me
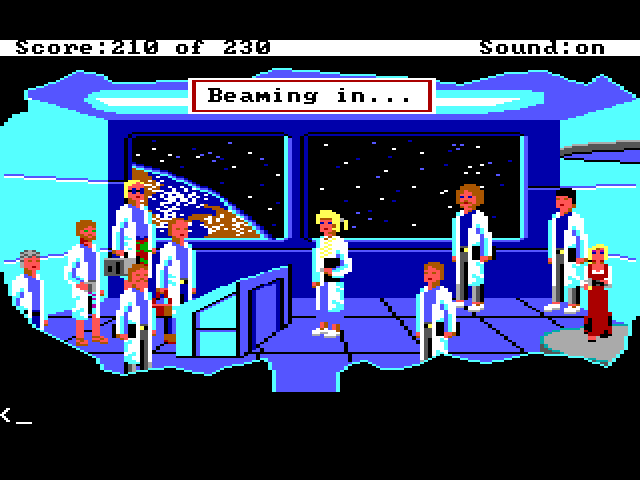
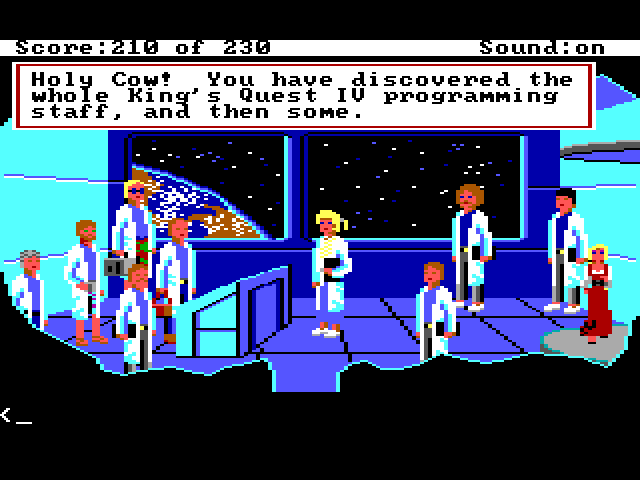
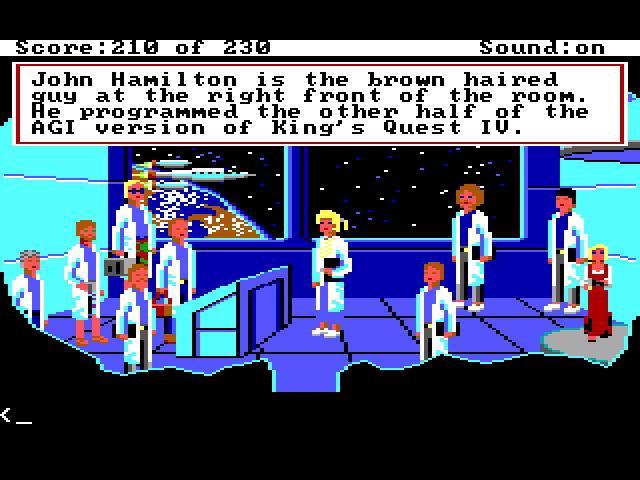
Similar to the KQ4 Rap egg, after defeating Lolotte, go to the corridor outside of the dungeon and type beam me, which will take Rosella to a secret room populated by the game developers. Note that John Hamilton is one of the mentioned personnel when you look at the people in this room. More about John in a bit.
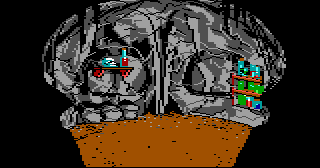
John was Here
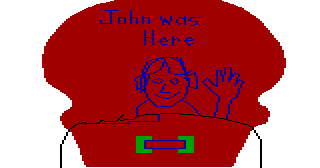
I came across this secret "cave painting" a few months ago when inspecting the priority bands in various rooms of this game. The "John" mentioned in this scrawling is likely John Hamilton, one of the programmers on the AGI version of KQ4. More about this Easter egg was written here.
James Whale
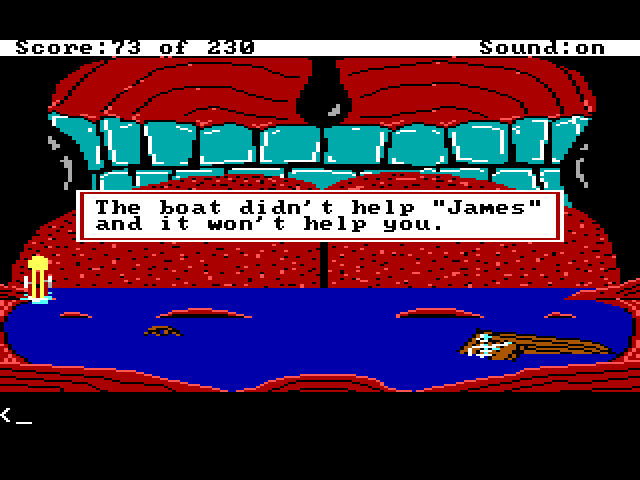
If you look at the boat in the whale's mouth, it identifies the skeleton as "James". This is James in a whale, which might be a play on the name of James Whale, the director of classic horror films like Frankenstein and The Invisible Man.
Procrastination
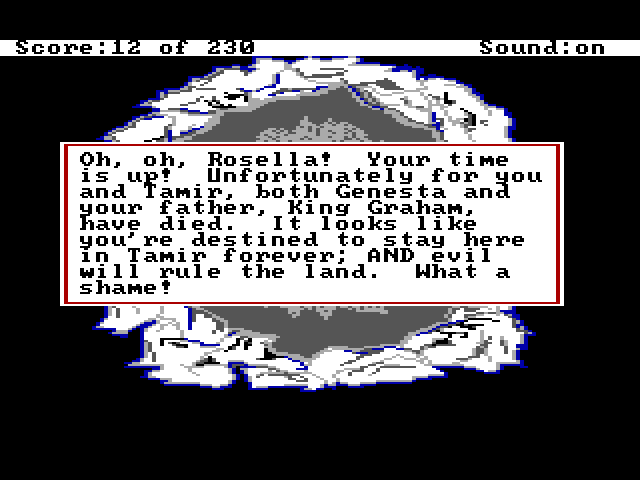
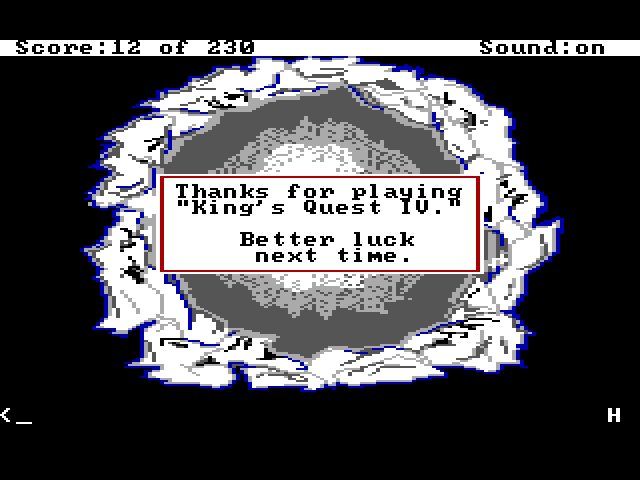
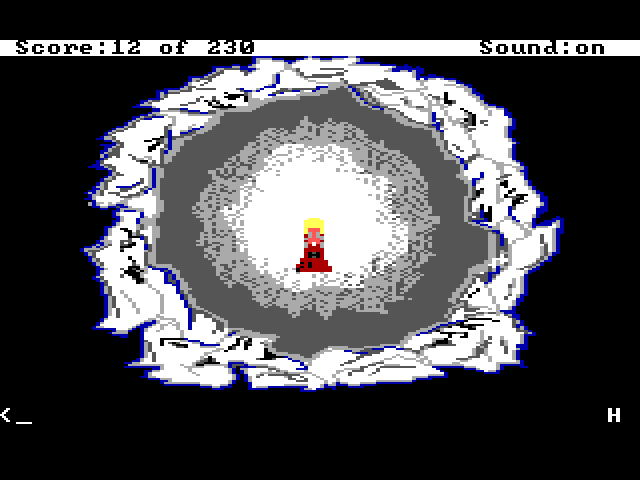
One of the innovative features of King's Quest IV was not just the passage of real time (King's Quest III had already implemented that feature), but the day to night sequence. There is a limited amount of time to complete the game, generally enough, but it is possible to lose by waiting too long. If the game becomes 6:00 AM and you haven't killed Lolotte yet, the game will be over, as displayed in these screenshots for the "death" scene.
Letting Graham Die
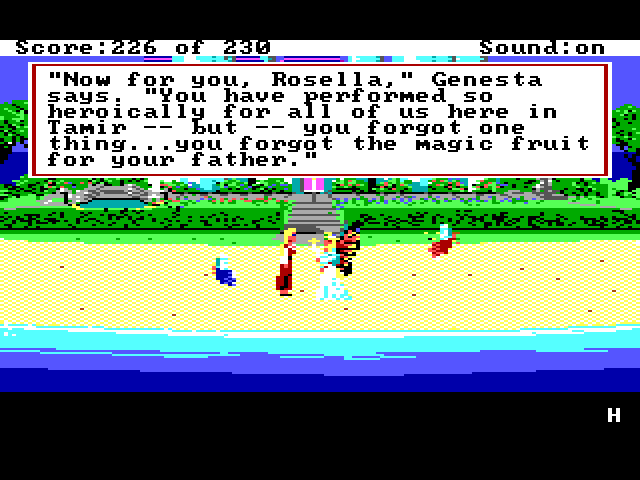
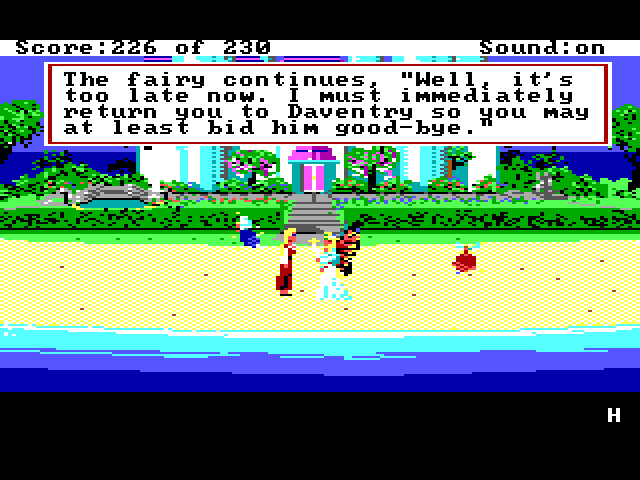
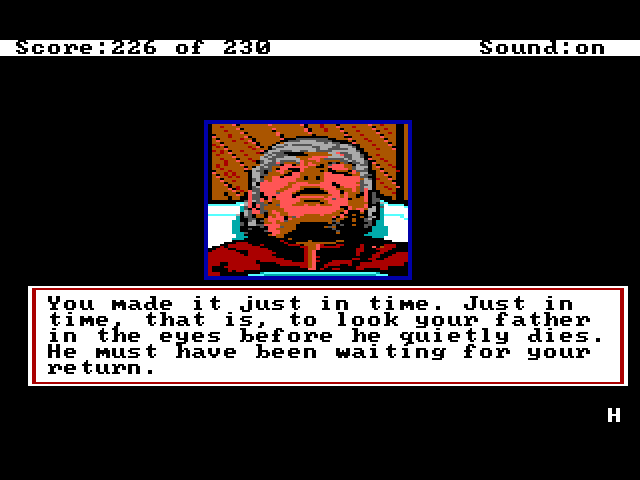
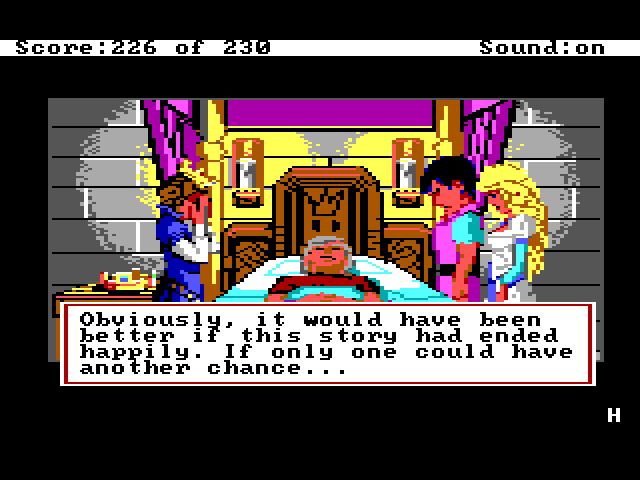
This is not an Easter egg, per se, but probably not a scene you see too often unless you forgot to get the magic fruit or ate it.
Secret Code
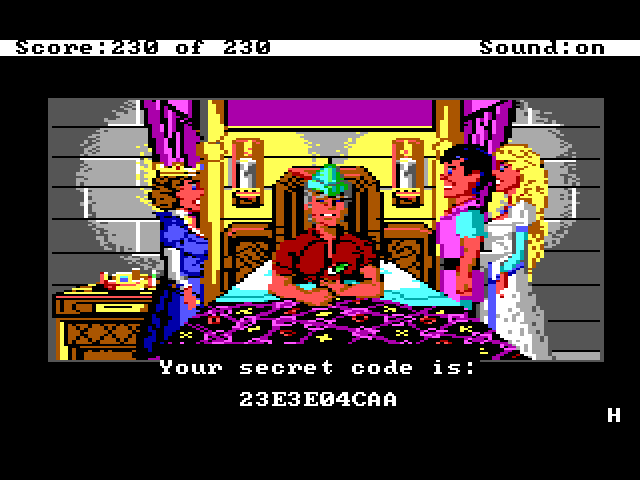
Early boxed copies of King's Quest IV bore a sticker for a contest to win a trip to England. If you could complete the game and earn all 230 points, you would be presented with a secret code, which was used as evidence that you completed the entire game for the contest. The updated SCI version of the game included in later removed the code, since the contest was long over.
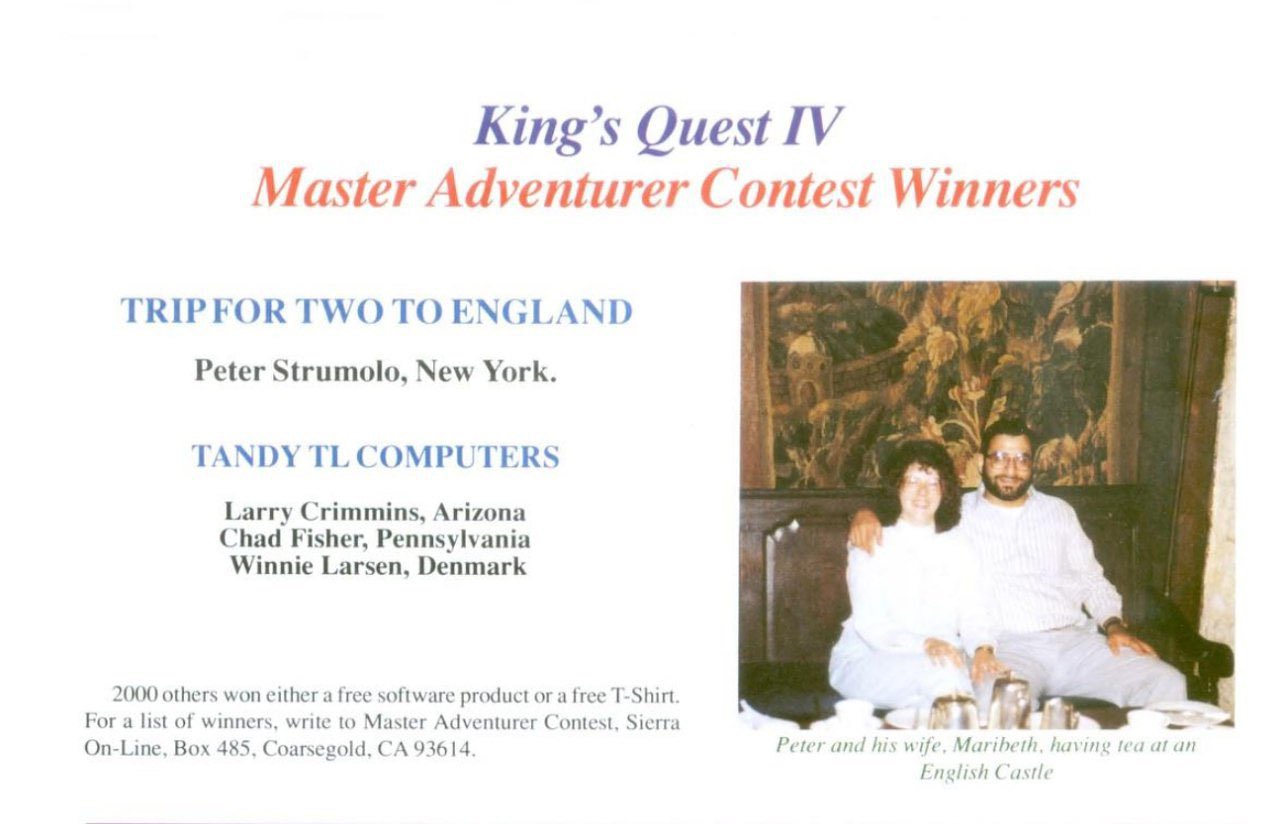
And if you ever wondered if someone did win that fabulous trip to England (or other fantastic prizes), here's the answer:
Resources
21st February 2021 | Games
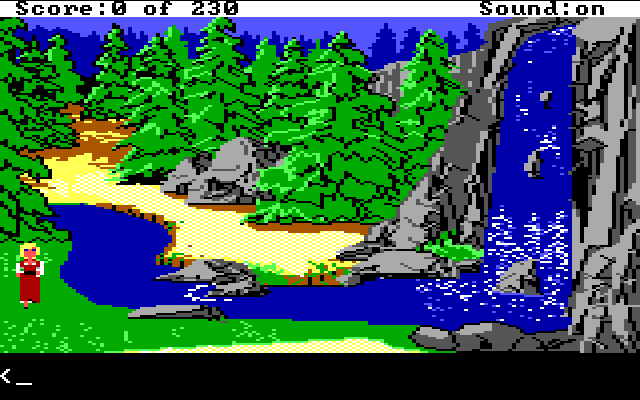
One thing which makes King's Quest IV unique is that it was the only Sierra game which was simultaneously developed for two different game engines: AGI and SCI. The version most people have played is the SCI version, which featured advancements such as higher graphics resolution and sound card support. This is also the version which comes with KQ collections. The AGI version was intended for computers which wouldn't be able to take full advantage of the new features in the SCI version, plus it was provided as the base to port to older systems like the Apple IIGS and Atari ST. The only way to play the AGI version of KQ4 is to do some searching on the internet or procure a very rare boxed copy.
Like nearly all games of this era, KQ4 came on multiple floppy disks. The AGI version came on three 3.5" 720K disks, whereas the SCI version required four 3.5" disks. If I was playing this game on a Tandy in 1988, I would be doing disk swapping as Rosella moved throughout the land of Tamir, but with modern computers, the preferred method is to emulate installing the game onto a hard drive. Using DOSBox to install a game from a CD is not overly complex, but trying to install from multiple floppy disks involves more work. This blog details the process to install King's Quest IV (or another multi-floppy disk DOS game) onto a Mac.
To start, I used Disk Utility to create the disk images, but they are saved out as dmg instead of img. To convert the disk images to be useful to DOSBox, I used the following commands from the Terminal:
hdiutil convert Disk1.dmg -format RdWr -o disk1.img
hdiutil convert Disk2.dmg -format RdWr -o disk2.img
hdiutil convert Disk3.dmg -format RdWr -o disk3.img
Note: In more recent versions of macOS (e.g. macOS 13.7.1 Ventura), the RdWr has been deprecated and is no longer available with the hdiutil command. I needed to use an older version of macOS (10.14 Mojave) to be able to convert a DMG into an IMG.
Once I had created disk images for all three floppy disks for the AGI version of King's Quest IV, I then tried the following command in DOSBox 0.74-3 to mount all three disk images:
imgmount a -t floppy disk1.img disk2.img disk3.img
The resulting error:
Using multiple files is only supported for cue/iso images.
It looks like I am not the only person who has encountered this issue. Older versions of DOSBox supported this functionality to mount multiple disk images, but it appears this feature hasn't been reintroduced back in the past decade. Since mounting multiple floppy disk images wasn't working, I tried an alternate approach by converting the DMG files to ISO images.
hdiutil convert Disk1.dmg -format UDTO -o disk1.iso
hdiutil convert Disk2.dmg -format UDTO -o disk2.iso
hdiutil convert Disk3.dmg -format UDTO -o disk3.iso
For some odd reason, hdiutil appends a cdr file extension to each of the ISO files, but a simple rename is all that is needed to finish creating the ISO files. Next up I tried to mount the series of ISO files.
imgmount a -t iso disk1.iso disk2.iso disk3.iso

Error:
Could not load image file: /Applications/DOSBox/dosbox/SIERRA/KQ4/KQ4Disks/disk2.iso
MSCDEX: Failure: Invalid file or unable to open.
Stymied by DOSBox's lack of cooporation, I tried DOSBox-X, a derivation of DOSBox, which is very similar to its parent project, but contains extra features and support for more than just DOS games. I then tried IMGMOUNT to mount multiple floppy disk images (IMG disk images, not ISOs), and it worked! With the floppy disks now mounted under the a: drive, I switched over to that drive and ran INSTALLH.BAT to begin the installation process. When prompted, I used the Swap menu in DOSBox-X to change out the virtual floppy disks. If this process had worked properly under DOSBox, I would have used the keyboard shortcut CTRL+F4 (or the Drive > A > Swap Disk menu) to switch between the various disks.
With King's Quest IV now installed, I could use tools like DOSBox or ScummVM to launch and play the game.
December 2024 Update
When trying to install the game Conquests of the Longbow from the original floppy disks, I followed these steps, which resulted in encountering some new issues and clarifying some of these steps.
When I created the original disk images (DMG), from Disk Utility, I right-clicked on the disk drive and told it to create a disk image. Unfortunately, when trying to use hdiutil to conver the DMG to IMG, I discovered that the RdWr option had been deprecated since I first wrote these instructions, so that was no longer a valid approach on modern Macs. In the future, I'll either need to look for a new approach or continue to use my older Macs to create appropriate disk images.
To mount all six floppy disks in DOSBox-X, I used the command:
imgmount a -t floppy disk0.img disk1.img disk2.img disk3.img disk4.img disk5.img
I then switched over to the A drive, and ran the installer. To switch between the disks, I used DOSBox-X's menu to swap disks, and this worked fine through the installer until I got to the last disk where the installer could not "find" the fifth disk. I verified that disk5.img was mounting properly and I saw it contained the file resource.000. The fourth disk image also had a file with the same name, so I'm not certain if there was a typo of the files or if the resource.000 was too large and split across multiple floppy disks. I took a look at the installer script file INSTALL.SCR, which is just a plain text file, and I noticed this bit:
exists %2:resource.005 Please insert the disk labeled "Disk 5" in drive %2:.
copy %2:resource.005
Interesting...it looks like the script was expecting the fifth disk to contain a file named resource.005, instead, so the script was not able to "find" the disk image, even though it was mounting properly. I ended up manually copying over the file from the fifth disk, renamed it from resource.000 to resource.005, and then verified it ran under DOSBox and ScummVM. The DOSBox audio seemed weird, but ScummVM seemed to handle the game a little better.
21st February 2021 | Games
I was using AGI Studio to inspect the background images in the AGI version of King's Quest IV and came across something interesting with one of the priority images, which defines the walkable areas and provides the sense of depth in a scene. Picture 57 displays the inside of the three witches' cave. However, the priority screen for picture 57 reveals a hidden cave drawing of a person waving underneath the words "John was Here". So who was John? A quick look at the intro credits gives us a good clue as one of the programmers with this version of KQ4 was John Hamilton.
Programmers are often known for their love of slipping in Easter eggs into games, so it would not be far fetched if this bit of crude artistic work was a well hidden gem by one of the game's programmers. According to The Sierra Chest, the AGI version of King's Quest IV was the only Sierra title John Hamilton worked on. The MobyGames site has a little more info about him and mentions that KQ4 was his first title and then went to work on a number of other games up through the early 2000s. So, Mr. Hamilton, if you are around, hello! We found your cave sketchings (some 30+ years later)!
18th January 2021 | Programming
The initial post about Agifier announced the capabilities of this Acorn plug-in, but the focus of this post will be about the more in-depth details on the research and construction of the software.
The initial considerations to convert an image to have the appearance of a 1980s computer game were resizing and coloring. Resizing seemed simple enough (in principle, at least), but the details would prove to be a little more complex than just altering the size of the image. Modifying the colors proved to be a very deep rabbit hole.
Resizing
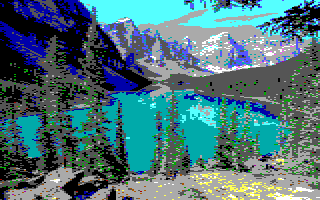
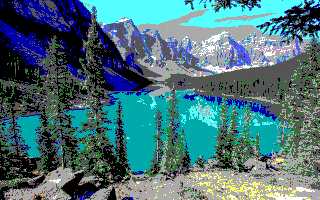
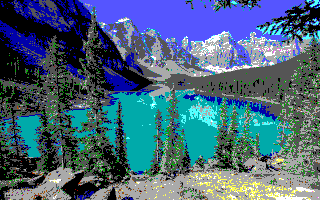
The AGI Sierra On-Line games from the 80s had a screen resolution of 160 x 200 (width x height), but due to the nature of the double-wide pixels, it stretched out to 320 x 200. To emulate this appearance, the original image needs to have its width resized down to 320 pixels (and maintain the aspect ratio of the image so the height is also modified accordingly) and then resized again to 160 pixels in width, but retain the new height, and finally stretch the width back out to 320 pixels. The concept is straightforward, but there are numerous resizing algorithms available. The Acorn app has three available resizing options: Lanczos, Simple Affine, and Nearest Neighbor. The following images display the difference of each of these resizing algorithms on the same photo of Moraine Lake.
Lanczos (Slightly blurry)

Simple Affine (Clearest)

Nearest Neighbor (Most pixelated)

Since I am going for the pixelated look, I want to use the Nearest Neighbor approach. The Acorn plug-in makes heavy use of CIImage and CIFilters, and from what I experimented with (and used to some degree), there is not a CIFilter to resize an image using the nearest neighbor algorithm, whereas there are the CIFilters CILanczosScaleTransform and CIAffineTransform for the other resizing algorithms. To work around this and ensure there was the proper pixelated appearance with hard edges (versus the blurrier edges produced by the other algorithms), I constructed a new NSBitmapImageRep and then created a CIImage object from the bitmap.
// Draw out the updated colors to the resizedBitmap to create the pixelated double-wide pixels look
// This bitmap is twice the width of resizedImage
NSBitmapImageRep *resizedBitmap = [[NSBitmapImageRep alloc]
          initWithBitmapDataPlanes:NULL
                        pixelsWide:width*2
                        pixelsHigh:height
                     bitsPerSample:8
                   samplesPerPixel:4
                          hasAlpha:YES
                          isPlanar:NO
                    colorSpaceName:NSCalibratedRGBColorSpace
                       bytesPerRow:0
                      bitsPerPixel:0];
resizedBitmap.size = NSMakeSize(width*2, height);

// Use GCD to help parallelize this, otherwise this is noticeably slooooow
dispatch_apply(width, dispatch_get_global_queue(0, 0), ^(size_t x) {
	for (size_t y = 0; y < height; y++) {
		// Map each of the possible 64 colors to a 16 color EGA palette.
		NSColor *originalPixelColor = [bitmap colorAtX:x y:y];
		NSColor *newPixelColor = [self closestEGAColor: originalPixelColor];

		// Draw out the double-wide pixel to resizedBitmap
		[resizedBitmap setColor: newPixelColor atX: (2*x) y: y];
		[resizedBitmap setColor: newPixelColor atX: (2*x)+1 y: y];
	}
});

CIImage *outputImage = [[CIImage alloc] initWithBitmapImageRep: resizedBitmap];
The closestEGAColor method will be discussed in the next section on how to determine an approximate EGA color.
Coloring
The visual capabilities of computer monitors advanced quickly from 1980 - 1995, advancing from monochrome displays to millions of colors. The time period that the Agifier script is trying to emulate is the later half of the 1980s where the 16 color EGA palette was the standard. Trying to down sample colors to match up to EGA colors proves to be tricky. My first attempt involved using a standard algebraic formula to try and find the EGA color which was closest to a given pixel's color.
The algorithm loops through all 16 EGA colors and does the calculation to determine which color is the closest. If the distance is equal to 0, that represents an exact color match.
// The original code that performed a mathematical calculation of the "closest" EGA color,
int indexOfClosestColor = 0;
double shortestDistance = 255 * sqrt(3.0);

// Loop through all 16 possible EGA colors
// Perform the calculation of how "far" pixelColor is from an EGA color
// If the distance is 0, then it is a perfect match.  Stop looping.
// Otherwise, keep looping and just keep track of the color with the "shortest" distance.
CGFloat r2 = [pixelColor redComponent];
CGFloat g2 = [pixelColor greenComponent];
CGFloat b2 = [pixelColor blueComponent];

for (int i = 0; i < 16; i++)
{
	NSColor *currentColor = colorPalette[i];

	CGFloat r1 = [currentColor redComponent];
	CGFloat g1 = [currentColor greenComponent];
	CGFloat b1 = [currentColor blueComponent];

	// Good old algebra used to calculate the distance between the color components in 3D space
	CGFloat distance = sqrt(pow((r2 - r1), 2) + pow((g2 - g1), 2) + pow((b2 - b1), 2));

	if (distance == 0.0)
	{
		shortestDistance = distance;
		indexOfClosestColor = i;
		break;
	}
	else if (i == 0)
	{
		shortestDistance = distance;
		indexOfClosestColor = i;
	}
	else
	{
		// What if distance == shortestDistance?
		if (distance < shortestDistance)
		{
			shortestDistance = distance;
			indexOfClosestColor = i;
		}
	}
}
Closest Color
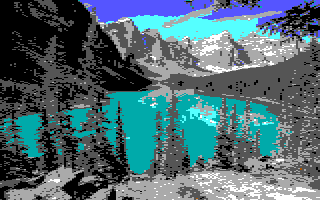
This did not always produce the most optimal results. Compare this photo to the ones above. It has a muted tone, and many of the greens and browns are washed out and become a shade of grey. Considering that green is one of the primary color components in the RGB space, green should be far more prominent.
For my next approach, I rounded each RGB component to it's closest 1/3 value, since each of the EGA component values are stepped by a third (hex values of 0x00, 0x55, 0xAA, and 0xFF or 0.0, 0.3333, 0.6666, 1.0 in decimal). The bestColorComponentValue method displays the process of rounding a color component (red, green, or blue), so each component can have one of four different values. This results in a palette of 64 different colors (4 x 4 x 4 = 64), which is the full EGA color palette. The traditional 16 color palette favored by 80s Sierra games is only a subset of the entire array of EGA colors.
// Reduce each color component to the closest EGA-style equivalent value.
// In hex, each component can only be 0x00, 0x55, 0xAA, or 0xFF (0, 85, 170, 255)
// 0x00 = 0 = 0
// 0x55 = 85 = 0.333333
// 0xAA = 170 = 0.6666667
// 0xFF = 255 = 1.0
- (CGFloat) bestColorComponentValue: (CGFloat) colorComponent
{
	if (colorComponent < 0.166666)
	{
		return 0.0; // 0x00
	}
	else if (colorComponent < 0.5)
	{
		return 1.0/3.0; // 0x55
	}
	else if (colorComponent < 0.833333)
	{
		return 2.0/3.0; // 0xAA
	}
	else
	{
		return 1.0; // 0xFF
	}
}
64 EGA Colors
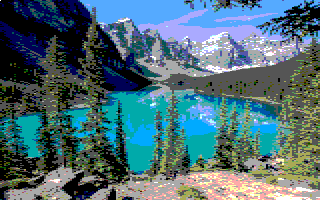
This produced closer results. What I didn't realize at the time was I had generated the full 64 EGA color palette by using this method. From here I then tried to calculate the equivalent 16 color variant using the mathematical equation, but the colors were still not quite right.
64 Down Sampled to 16 EGA Colors
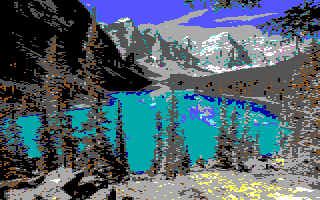
I also tried modifying the saturation levels, which helped at times by strengthening the intensity of the colors. Working with the EGA palette can be an interesting challenge since it is limited, and its set of colors are strong, which excludes the many shades we see in the real world. Considering that each picture can be different, changing settings such as the saturation will work for some but not for others.
The results of the initial 1.0 version of the Agifier script are available in this tweet thread, which includes examples others tried and recommendations of other techniques, such as posterization and quantization. (Side note: For even more in-depth color techniques, check out Floyd-Steinberg dithering.)
When I returned to this project several months later, I did some research and came across a post which clued me in how close I had come. This post mentioned steps very similar to those I had taken. I was very close and just needed to take one more step.
From the 64 color palette, I then needed to manually "translate" each of the 64 colors down to 16 colors. Some colors were simple, but others were far more difficult. Some colors were directly in between two other colors, so I had to experiment with what worked best. I used a script which used the closest color equation to make a best guess, and I would then determine whether or not I agreed with that decision. After running a couple of landscape photos through the Agifier script, I tweaked it to help bring out the greens so they didn't get muted and turned to either grey or brown. The math was useful at times when I was indecisive about which color to choose, but for most of the colors, I manually determined the best match.
Below are two different representations of the 64 color EGA palette. The same set of colors, just grouped differently to display how the colors compare and contrast. In the first example, the darker colors are in the top left, greens in the bottom left, reds in the top right, and lighter colors in the bottom right. In the second example, the reds and greens are more predominant on the left side, but more paisley colors are on the right. Same set of colors, represented two different ways.
| 64-Color EGA Palette: Example 1 |
| #000000 |
|
#550000 |
|
#AA0000 |
|
#FF0000 |
|
| #000055 |
|
#550055 |
|
#AA0055 |
|
#FF0055 |
|
| #0000AA |
|
#5500AA |
|
#AA00AA |
|
#FF00AA |
|
| #0000FF |
|
#5500FF |
|
#AA00FF |
|
#FF00FF |
|
| #005500 |
|
#555500 |
|
#AA5500 |
|
#FF5500 |
|
| #005555 |
|
#555555 |
|
#AA5555 |
|
#FF5555 |
|
| #0055AA |
|
#5555AA |
|
#AA55AA |
|
#FF55AA |
|
| #0055FF |
|
#5555FF |
|
#AA55FF |
|
#FF55FF |
|
| #00AA00 |
|
#55AA00 |
|
#AAAA00 |
|
#FFAA00 |
|
| #00AA55 |
|
#55AA55 |
|
#AAAA55 |
|
#FFAA55 |
|
| #00AAAA |
|
#55AAAA |
|
#AAAAAA |
|
#FFAAAA |
|
| #00AAFF |
|
#55AAFF |
|
#AAAAFF |
|
#FFAAFF |
|
| #00FF00 |
|
#55FF00 |
|
#AAFF00 |
|
#FFFF00 |
|
| #00FF55 |
|
#55FF55 |
|
#AAFF55 |
|
#FFFF55 |
|
| #00FFAA |
|
#55FFAA |
|
#AAFFAA |
|
#FFFFAA |
|
| #00FFFF |
|
#55FFFF |
|
#AAFFFF |
|
#FFFFFF |
|
| 64-Color EGA Palette: Example 2 |
| #000000 |
|
#000055 |
|
#0000AA |
|
#0000FF |
|
| #005500 |
|
#005555 |
|
#0055AA |
|
#0055FF |
|
| #00AA00 |
|
#00AA55 |
|
#00AAAA |
|
#00AAFF |
|
| #00FF00 |
|
#00FF55 |
|
#00FFAA |
|
#00FFFF |
|
| #550000 |
|
#550055 |
|
#5500AA |
|
#5500FF |
|
| #555500 |
|
#555555 |
|
#5555AA |
|
#5555FF |
|
| #55AA00 |
|
#55AA55 |
|
#55AAAA |
|
#55AAFF |
|
| #55FF00 |
|
#55FF55 |
|
#55FFAA |
|
#55FFFF |
|
| #AA0000 |
|
#AA0055 |
|
#AA00AA |
|
#AA00FF |
|
| #AA5500 |
|
#AA5555 |
|
#AA55AA |
|
#AA55FF |
|
| #AAAA00 |
|
#AAAA55 |
|
#AAAAAA |
|
#AAAAFF |
|
| #AAFF00 |
|
#AAFF55 |
|
#AAFFAA |
|
#AAFFFF |
|
| #FF0000 |
|
#FF0055 |
|
#FF00AA |
|
#FF00FF |
|
| #FF5500 |
|
#FF5555 |
|
#FF55AA |
|
#FF55FF |
|
| #FFAA00 |
|
#FFAA55 |
|
#FFAAAA |
|
#FFAAFF |
|
| #FFFF00 |
|
#FFFF55 |
|
#FFFFAA |
|
#FFFFFF |
|
EGA Look-up Table
Based upon the 64-color EGA tables, I matched each color up with an appropriate color from the 16-color EGA table.
The colors which are equivalent are denoted in bold. Some of the colors required some experimentation to see what would produce more life like images and not wash out the colors in the process. For some of the colors which were directly between two 16 palette EGA colors (e.g. #000055, #5555AA, or #FFFFAA), I tended to side with the color rather than a highlight (black, greys, white).
| 64-Color EGA Palette |
| #000000 |
|
0 |
|
| #000055 |
|
1 |
|
| #0000AA |
|
1 |
|
| #0000FF |
|
1 |
|
| #005500 |
|
2 |
|
| #005555 |
|
8 |
|
| #0055AA |
|
1 |
|
| #0055FF |
|
9 |
|
| #00AA00 |
|
2 |
|
| #00AA55 |
|
2 |
|
| #00AAAA |
|
3 |
|
| #00AAFF |
|
3 |
|
| #00FF00 |
|
2 |
|
| #00FF55 |
|
10 |
|
| #00FFAA |
|
3 |
|
| #00FFFF |
|
11 |
|
| #550000 |
|
4 |
|
| #550055 |
|
8 |
|
| #5500AA |
|
1 |
|
| #5500FF |
|
9 |
|
| #555500 |
|
8 |
|
| #555555 |
|
8 |
|
| #5555AA |
|
9 |
|
| #5555FF |
|
9 |
|
| #55AA00 |
|
2 |
|
| #55AA55 |
|
2 |
|
| #55AAAA |
|
3 |
|
| #55AAFF |
|
11 |
|
| #55FF00 |
|
10 |
|
| #55FF55 |
|
10 |
|
| #55FFAA |
|
10 |
|
| #55FFFF |
|
11 |
|
| #AA0000 |
|
4 |
|
| #AA0055 |
|
4 |
|
| #AA00AA |
|
5 |
|
| #AA00FF |
|
5 |
|
| #AA5500 |
|
6 |
|
| #AA5555 |
|
6 |
|
| #AA55AA |
|
5 |
|
| #AA55FF |
|
9 |
|
| #AAAA00 |
|
2 |
|
| #AAAA55 |
|
7 |
|
| #AAAAAA |
|
7 |
|
| #AAAAFF |
|
7 |
|
| #AAFF00 |
|
10 |
|
| #AAFF55 |
|
10 |
|
| #AAFFAA |
|
7 |
|
| #AAFFFF |
|
11 |
|
| #FF0000 |
|
4 |
|
| #FF0055 |
|
12 |
|
| #FF00AA |
|
5 |
|
| #FF00FF |
|
13 |
|
| #FF5500 |
|
12 |
|
| #FF5555 |
|
12 |
|
| #FF55AA |
|
12 |
|
| #FF55FF |
|
13 |
|
| #FFAA00 |
|
6 |
|
| #FFAA55 |
|
14 |
|
| #FFAAAA |
|
7 |
|
| #FFAAFF |
|
13 |
|
| #FFFF00 |
|
14 |
|
| #FFFF55 |
|
14 |
|
| #FFFFAA |
|
14 |
|
| #FFFFFF |
|
15 |
|
| 16-Color EGA Palette |
| 0 |
#000000 |
|
| 1 |
#0000AA |
|
| 2 |
#00AA00 |
|
| 3 |
#00AAAA |
|
| 4 |
#AA0000 |
|
| 5 |
#AA00AA |
|
| 6 |
#AA5500 |
|
| 7 |
#AAAAAA |
|
| 8 |
#555555 |
|
| 9 |
#5555FF |
|
| 10 |
#55FF55 |
|
| 11 |
#55FFFF |
|
| 12 |
#FF5555 |
|
| 13 |
#FF55FF |
|
| 14 |
#FFFF55 |
|
| 15 |
#FFFFFF |
|
By using a look-up table instead of doing a mathematical calculation, this speeds up the process in determining new colors in the plug-in.
// Get the normalized color where each RGB component is set to either 0x00, 0x55, 0xAA, or 0xFF
NSColor *updatedPixelColor = [self closerEGAColor:pixelColor];
NSString *updatedPixelHexValue = [self convertNSColorToHex:updatedPixelColor];
// Find the closest matching color in the 16-color palette
NSNumber *colorPaletteIndex = colorMatch[updatedPixelHexValue];

return colorPalette[[colorPaletteIndex intValue]];
Conclusion
As seen in this final example, the colors are far more vibrant than in the Closest Color example where nearly all colors beside the blues became dull shades of grey. The level of research which could go into trying to sample truer colors could get incredibly deep and complex, but for now this is a decent representation to display what an AGI-era Sierra game could have looked like, even with only 16 colors and 32,000 pixels (160x200 screen dimension).
To summarize the steps the Agifier plug-in (version 1.2) uses to create low-res image in the style of a 1980s Sierra computer game:
- Reduce the image to a max width of 320 pixels (maintain the aspect ratio).
- Resize the image to 160px in width, but maintain the height.
- Loop through each pixel and find the approximate EGA color.
- Save out the new color to two pixels in the new double-wide image, which will result in an image 320px in width.
References
9th January 2021 | Programming
Two years ago I ported QT AGI Studio to the Mac, an application that can view, modify, and create Sierra On-Line AGI games from the 1980s. It was a great start and an indispensable tool for creating King's Quest 1 - Redux, but there were still several items on the TODO list to complete.
The previous TODO list:
- Read and write to v3 of AGI programs (e.g. King's Quest IV, Gold Rush!, Manhunter 1 or 2)
- Fix UI issues (misaligned buttons and other widgets)
- Add additional usability features (keyboard shortcuts, etc.)
- Build script to rename the app bundle from agistudio to AGI Studio, run macdeployqt, install_name_tool, and copy over the Info.plist file
- Code sign and notarize the app
- Enable playing sounds on Macs (currently a Linux-only feature)
Pretty much everything was checked off and more. The only item not completed was the sound player for Mac. Future features and improvements include building an Apple silicon (M1) version and upgrade to the Qt 5 libraries so this project can be built on more modern hardware and software (the current development machine is a 2007 MacBook Pro running Mac OS X 10.6.8).
I had been working on some improvements to AGI Studio earlier last year, but when I came across Chris Cromer's 1.3.2 branch of the original project, I integrated in his improvements which fixed a couple of issues with the drawing tools. I also added a number of Mac-specific improvements to the app (keyboard shortcuts, fixed UI alignment issues, code signing and notarization).
New Features
-
Integrated 1.3.2 changes from https://git.cromer.cl/cromer/qt-agistudio
- Fixed view editor fill not updating the canvas
- Fixed pic edit not updating the canvas
- Open V3 AGI Games (King's Quest IV, Gold Rush!, Manhunter 1 and 2)
- Added help and template files for Mac
- Fixed UI alignment of several buttons
- Added Mac-specific keyboard shortcuts
- Created a script to properly construct and deploy the Mac app bundle
- Code signed and notarized
Glob (Why V3 Games Weren't Opening)
The biggest fault of the previous version of AGI Studio for Mac is that it could not open up Version 3 AGI games, which include the both Manhunter games, Gold Rush!, and the AGI version of King's Quest IV. (The SCI version of KQ4 is more well known, but an AGI version was also developed at the same time to be able to run on less powerful computers of the time.) I parsed through AGI Studio's code to determine the source of the problem with opening V3 games. When working through a problem, often the best way is to isolate the issue, so I wrote the following small C program to determine why AGI Studio was not able to open up V3 AGI games. The issue centers around the glob function which generates path names matching a pattern. Below is a stand-alone C program which can be compiled and run in the same directory as an AGI game to determine the game's version number.
The issue was that when glob is run on the Mac, it is case sensitive with the name of the path or file being passed in as an argument. Other operating systems may be case insensitive, so the capitalization of a file name would not matter. The original code for Linux and Mac looked like this:
sprintf(tmp, "%s/*vol.0", name);

if (glob (tmp, GLOB_ERR | GLOB_NOSORT, NULL, &globbuf)) {
	...
}
The problem with glob on the Mac is due to its case sensitivity. In the original code, file names like dir and vol were in all lowercase, yet the file names of these Sierra games are generally in all caps (e.g. KQ4VOL.0, MH2DIR). When glob tried to find a pattern that matched vol.0, it couldn't find any files. By changing terms like dir or vol to DIR and VOL in the code resolved the problem. A simple solution for a wily problem.
Build Script and Code Signing
While QT AGI Studio does create a Mac app bundle, it is missing numerous steps. The macdeployqt utility helps a bit by adding the missing QT frameworks to the app bundle, but the older version (4.8) I have been using is incomplete in how it sets things up and requires a number of additional steps to get the frameworks configured properly. As I mentioned in my previous post about QT AGI Studio, the install_name_tool utility needs to be called against the Qt3Support, QtGui, and QtCore frameworks to properly set up their paths. After I had completed these steps, I then code signed and notarized the app, but encountered the first of numerous errors.
In the initial port of AGI Studio, I did not bother with code signing the app bundle, because code signing almost always comes with unwanted headaches. I was not wrong in this assumption, as trying to code sign and then notarize AGI Studio resulted in numerous issues. I first tried to use SD Notary to sign the release build of AGI Studio.app 1.3.2, but it threw the following error:
20:40:21.170: Creating working copy...
20:40:21.252: Clearing extended attributes...
20:40:21.841: Examining contents...
20:41:10.605: Signing '.../Contents/Frameworks/QtSql.framework/Versions/4/QtSql'...
20:41:12.082: Signing '.../Contents/Frameworks/QtSql.framework/Versions/4'...
20:41:12.897: Error 105553131805344 signing 'qt-agistudio/agistudio-build-Desktop-Release/AGI Studio - Working/AGI Studio.app/Contents/Frameworks/QtSql.framework/Versions/4': qt-agistudio/agistudio-build-Desktop-Release/AGI Studio - Working/AGI Studio.app/Contents/Frameworks/QtSql.framework/Versions/4: bundle format unrecognized, invalid, or unsuitable
After some research, I learned this issue was because the QT frameworks generated by macdeployqt did not include the Info.plist file. I also discovered that another failure point is that the Info.plist files were missing the CFBundleVersion and CFBundleIdentifier key-value pairs, which are necessary to properly code sign the bundled QT frameworks. I manually copied over the plist file from the original framework and then added the missing key-value pairs using the built-in developer utility PlistBuddy.
cp /Library/Frameworks/Qt3Support.framework/Contents/Info.plist ./agistudio.app/Contents/Frameworks/Qt3Support.framework/Resources/
/usr/libexec/PlistBuddy -c "Add :CFBundleVersion string 4.8" ./agistudio.app/Contents/Frameworks/Qt3Support.framework/Resources/Info.plist
/usr/libexec/PlistBuddy -c "Add :CFBundleIdentifier string org.qt-project.Qt3Support" ./agistudio.app/Contents/Frameworks/Qt3Support.framework/Resources/Info.plist
With the updated Info.plist put in place, I tried code signing again, but this time from the command line.
codesign --deep --force  -v --sign "Developer ID Application: John Doe (12AB34567D)" --options runtime AGI\ Studio.app
AGI Studio.app: resource fork, Finder information, or similar detritus not allowed
I've seen this "detritus" error before when I've ported games to the Mac, so I knew what was needed to clean up the app by using the xattr command.
% xattr -lr AGI\ Studio.app
AGI Studio.app/Contents/Resources/template/.DS_Store: com.apple.FinderInfo:
00000000  00 00 00 00 00 00 00 00 40 00 00 00 00 00 00 00  |........@.......|
00000010  00 00 00 00 00 00 00 00 00 00 00 00 00 00 00 00  |................|
00000020
AGI Studio.app/Contents/Resources/template/template/.DS_Store: com.apple.FinderInfo:
00000000  00 00 00 00 00 00 00 00 40 00 00 00 00 00 00 00  |........@.......|
00000010  00 00 00 00 00 00 00 00 00 00 00 00 00 00 00 00  |................|
00000020
AGI Studio.app/Contents/Resources/application.icns: NSStoreType: IconsFileStore
AGI Studio.app/Contents/Resources/application.icns: NSStoreUUID: 92D51D68-6006-43DC-ADF5-CD20294177D9
AGI Studio.app/Contents/Resources/application.icns: com.apple.FinderInfo:
00000000  00 00 00 00 69 63 6E 43 00 00 00 00 00 00 00 00  |....icnC........|
00000010  00 00 00 00 00 00 00 00 00 00 00 00 00 00 00 00  |................|
00000020
AGI Studio.app/Contents/Info.plist: com.apple.FinderInfo:
00000000  54 45 58 54 00 00 00 00 00 00 00 00 00 00 00 00  |TEXT............|
00000010  00 00 00 00 00 00 00 00 00 00 00 00 00 00 00 00  |................|
00000020
AGI Studio.app/Contents/Info.plist: com.apple.TextEncoding: UTF-8;134217984
% xattr -cr AGI\ Studio.app
% xattr -lr AGI\ Studio.app
I then did another code sign and verified it with spctl, but this resulted in another error:
spctl --verbose=4 --assess --type execute AGI\ Studio.app
AGI Studio.app: rejected (embedded framework contains modified or invalid version)
As I mentioned earlier, code signing can be quite the frustrating and harrowing experience when things don't go smoothly. After yet more research I discovered that this latest error was due to the QT frameworks not being structured properly, so I was going to need to perform additional maintenance on the frameworks. In addition to adding the Info.plist file, I needed to move the Resources folder and then create symlinks for the framework's executable (e.g. QtCore) and for Resources and Current. The bundled QtCore framework created by macdeployqt has the following directory structure:
QtCore.framework/
    Resources/
    Versions/
        4/
            QtCore
However, it should be structured like the following to match Apple's recommendations on how to construct a framework:
QtCore.framework/
    QtCore -> Versions/Current/QtCore
    Resources -> Versions/Current/Resources
    Versions/
        Current -> 4
        4/
            QtCore
            Resources/
                Info.plist
A lot of this stems from the usage of older Qt utilities, and when code signing was updated with OS X 10.9.5 Mavericks, it required the frameworks to be properly structured, and the old style did not work. To fix this issue, I created the setup_framework function in the build_app_bundle.sh script to help automate the restructuring of the six QT frameworks.
Now with the frameworks properly set up, the script then copies over the help files, the template files to create a new AGI game, and the primary Info.plist for the main app bundle. The final step is to rename the app bundle from agistudio.app (the name that AGI Studio names the app bundle) to AGI Studio.app.
The final script to build the Mac app bundle for AGI Studio.
By this point, I thought I was in the clear. I was able to successfully code sign and notarize the app without any errors. I downloaded the app to another computer to verify that it can open and properly pass Gatekeeper's checks. The good news is that it did get past Gatekeeper. The bad news is that it crashed immediately:
Process: agistudio [12959]
Path: /Applications/AGI Studio 1.3.2.app/Contents/MacOS/agistudio
Identifier: com.edenwaith.agistudio
Version: 1.3.2 (1.3.2)
Code Type: X86-64 (Native)
Parent Process: ??? [1]
Responsible: agistudio [12959]
User ID: 501
Date/Time: 2021-01-01 20:27:40.525 -0700
OS Version: Mac OS X 10.14.6 (18G7016)
Report Version: 12
Anonymous UUID: BFCBBC98-7790-AD41-180E-4AF385B05848
Sleep/Wake UUID: 81F20208-DCC6-45DF-BA39-286064CC2BCF
Time Awake Since Boot: 210000 seconds
Time Since Wake: 6500 seconds
System Integrity Protection: enabled
Crashed Thread: 0
Exception Type: EXC_CRASH (SIGABRT)
Exception Codes: 0x0000000000000000, 0x0000000000000000
Exception Note: EXC_CORPSE_NOTIFY
Termination Reason: DYLD, [0x1] Library missing
Application Specific Information:
dyld: launch, loading dependent libraries
Dyld Error Message:
Library not loaded: @executable_path/../Frameworks/Qt3Support.framework/Versions/4/Qt3Support
Referenced from: /Applications/AGI Studio 1.3.2.app/Contents/MacOS/agistudio
Reason: no suitable image found. Did find:
/Applications/AGI Studio 1.3.2.app/Contents/MacOS/../Frameworks/Qt3Support.framework/Versions/4/Qt3Support: code signing blocked mmap() of '/Applications/AGI Studio 1.3.2.app/Contents/MacOS/../Frameworks/Qt3Support.framework/Versions/4/Qt3Support'
/Applications/AGI Studio 1.3.2.app/Contents/MacOS/../Frameworks/Qt3Support.framework/Versions/4/Qt3Support: stat() failed with errno=1
Binary Images:
0x100000000 - 0x10010cfe7 +com.edenwaith.agistudio (1.3.2 - 1.3.2) /Applications/AGI Studio 1.3.2.app/Contents/MacOS/agistudio
0x10e267000 - 0x10e2d170f dyld (655.1.1) <95E169F0-A47B-3876-BA72-9B57AF091984> /usr/lib/dyld
Great. Now what? Yes, time for yet more research. It looks like the hardened runtime that is necessary for notarizing an app had issues with the QT frameworks yet again. To disable the library validation, I needed to create a small Entitlements.plist file and add the com.apple.security.cs.disable-library-validation value.
<?xml version="1.0" encoding="UTF-8"?>
<!DOCTYPE plist PUBLIC "-//Apple//DTD PLIST 1.0//EN" "http://www.apple.com/DTDs/PropertyList-1.0.dtd">
<plist version="1.0">
<dict>
	<key>com.apple.security.cs.disable-library-validation</key>
	<true/>
</dict>
</plist>
The final (and working) version to properly code sign AGI Studio for Mac:
codesign --deep --force -v --sign "Developer ID Application: John Doe (12AB34567D)" --options runtime --timestamp --entitlements ./Entitlements.plist AGI\ Studio.app
Apple is always keeping code signing a "fun and exciting" process. This problems in trying to properly set up and deploy this app were compounded by using an older version of the QT tools and frameworks, mostly QT 3 and 4 libraries, whereas the current version of QT is version 6 which was released just a month ago. For any future development, I plan on updating the project to use at least QT 5, and hopefully this will also allow the option to make a universal binary version that can run natively on both Intel and Apple Silicon Macs.
References
7th January 2021 | Edenwaith
We are a mere week into 2021, and it has been confirmed that the world is still delightfully mad. Despite the past year being nuttier than Mr. Peanut, some interesting projects did come about this past year. I continued my exploration with games, primarily porting games developed with Adventure Game Studio to the Mac, but also wrote about Gabriel Knight 3, Curse of Monkey Island, and Quest for Glory III. I also wrote a plug-in for the Acorn image editor to transform a photo to look like an 8-bit image. A fourth part of the Reverse Engineering Sierra's Adventure Game Interpreter series was also written to show how to have a little fun with hacking Sierra games (and mocking "poisonous" snakes).
Just as the calendar flipped over, I released an update to the Mac version of AGI Studio, the utility I used to King's Quest 1 - Redux.
Software updates:
- EdenMath 1.2.2
- EdenList 2.1.1
- Permanent Eraser 2.8.1, 2.9.0, and 2.9.1
Development for Permanent Eraser 3.0 has officially started and will have a new focus and be geared for more modern Macs.
I have been mulling over the idea of retiring 33 RPM for a number of years, especially since it no longer works on macOS Catalina and Big Sur. At this time I am sending it off to a well earned retirement since there has been no real movement towards trying to rewrite the entire app (so far).
One project I mentioned I was working on last year was writing a novel. I was successful in completing the first draft, and I am currently in the process of editing the second draft. During this year's NaNoWriMo, I might visit the intersection of writing and technology by investigating TWINE. I might even try resurrecting my old text-based game Psychomancer this way.
A couple of game-related projects are planned for this year, including porting a couple more AGS games to the Mac.
28th December 2020 | Programming
The original King's Quest provided a dramatic jump in graphical abilities for 1984: a simulated 3D environment (in 16 glorious colors) where the player's character could move in front, behind, and around objects on the screen (3D environments love prepositions). For a time when graphics were generally limited to static images displayed in either monochrome or perhaps 4 CGA colors, this was quite revolutionary. What was cutting-edge for the time comes across as incredibly simplistic and bland today, yet it delivers its own particular brand of charm (deeply fueled by nostalgia), but with its limited palette of 16 bright colors, it offers an interesting set of constraints to generate digital art.
My work on King's Quest I - Redux focused mostly functional improvements, but I did make some small graphical improvements in the game (updating inventory objects, filling in inconsistent shading, removing invasive palm trees and sickly looking flora, etc.). Despite the limitations of the AGI graphics capabilities, the AGI version of King's Quest IV and Gold Rush! displayed what the engine could perform.
In the third part of my series which inspected reverse engineering Sierra's AGI game engine, I focused primarily on how colors are represented in these games. Trying to downscale a realistic photo to look like 80s computer graphics provides for some interesting challenges — some fairly trivial and others far more in depth.
To further explore the possibilities of creating semi-realistic artwork from actual photos, I created a plug-in for the Acorn image editor. This plug-in attempts to generate 80s-style graphics from real images, which could potentially be added to an AGI game. Based upon the nature and inspiration of the script, it has been named Agifier.
Screenshots
Below are examples of the Agifier script being run on a photo of Moraine Lake in Banff National Park. For some images, the plug-in does a fairly decent job, but it is not perfect, especially where subtle colors are concerned. The manually retouched image is the same as the second photo, but with the sky coloring updated by hand. This script tries to best match real world colors to EGA colors, but there are areas where manual intervention is needed for corrections.
Original

Modified by Agifier Acorn Plug-In
Manually Retouched
Download + Installation
- Download: Download the files directly from GitHub or install via git with the command
git clone https://github.com/edenwaith/Agifier.git
- Installation: Copy the
Agifier.acplugin plug-in bundle (found inside the Agifier folder) into ~/Library/Application Support/Acorn/Plug-Ins folder on your computer. Create the Plug-Ins folder if it does not exist yet.
- Usage: Restart Acorn after copying over the plug-in, then open a file and select the Filter > Stylize > Agifier menu. This will reduce the size of the image and reduce the color palette down to the standard 16 EGA colors that were used in Sierra games.
Conclusion
As of this writing, this is version 1.1 of the Agifier plug-in. The initial version was written back in July 2020, but it lacked the proper reduction of colors to the 16 color EGA palette. There are still several areas of improvement such as resizing using double-wide pixels (so each drawn pixel's dimensions are actually 2x1), additional color correction, and ensuring that resizing an image uses the nearest neighbor algorithm (not Lanczos or affine transform) to create a more pixel-y appearance. A follow up post will go into further detail about the technical aspects of this script.
References
20th September 2020 | Games
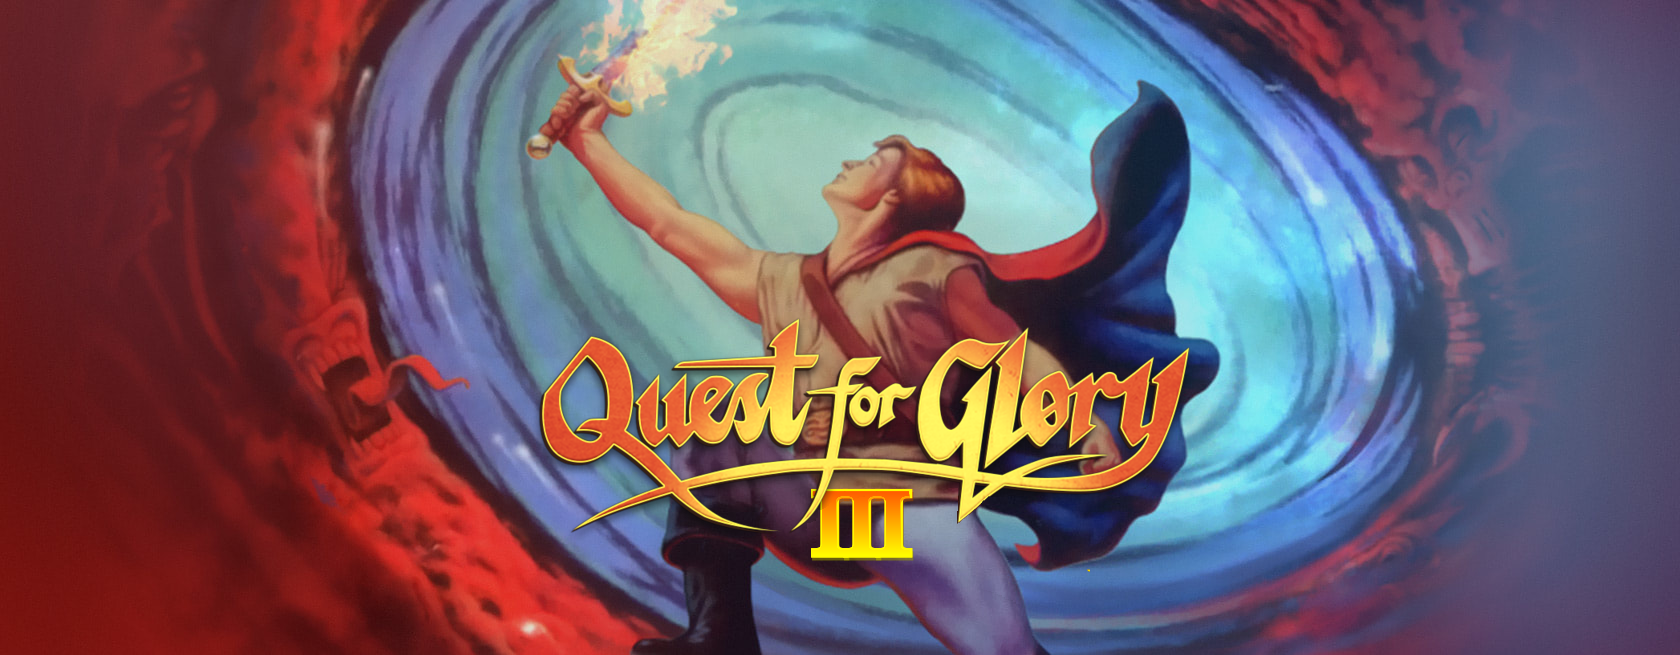
As I've written before, I play through at least one Quest For Glory game every year, and this year's was QFG3, probably the most polarizing entry of the entire series. It certainly has its fans (especially those who love the African narrative), but it definitely has more than its share of detractors. I am most certainly in the latter category. I still like the game far more than many other games, but it is easily the weakest game in this particular series. To make things a little more interesting, I applied a recent fan-made patch of the game which fixes a number of issues and even adds an extra scene or two. Let's see how things fared.
The Review
The Good:
- The art: The artistry of this game is quite superb, and the Sierra team knew how to take advantage of VGA graphics. The box art in particular is notable and stands out well against the other QFG games.
- Awari: This mini-game is my favorite addition to the game. Several months before I played QFG3, I had learned Mancala, a similar African board game.
- Characters: One of the defining features of QFG games are the unique and memorable characters, and QFG3 comes equipped with plenty of its own: Arne, Kalb, the junk merchants, plus the addition of a couple of gags like the Awful Waffle Walker and the French Legionnaires.
- Environment: The QFG series has not been immune from falling into the mountain village fantasy trope (QFG1 and 4 in particular), so QFG3 introduced a more unique environment which draws from numerous African settings (Egyptian, savanna, jungles).
The Bad:
- Way too short: Especially once the Leopardman has been caught, the rest of the game progresses very quickly. The first 250 points seem to move along pretty well, but the last 250 points progresses way too quickly.
- The Lost City is too small: There is very little to the Lost City, which is a squandered opportunity to have expanded the game. It is not much of a challenge, however the end battle is reminiscent of the end battle with Ad Avis in QFG2.
- The music: There is quite a bit of background music, but very little of it is overly memorable. I was listening to the QFG4 soundtrack, and it is amazing in comparison. Mark Seibert did an amazing job with the first two games, QFG4 is awesome, and Chance Thomas had an epic score with QFG5 which sounded like it belonged to a movie (which resulted in Chance leading a successful movement which brought game music into the Grammy Awards). The discordant chords after a battle are particularly annoying to me.
- The Thief got robbed: This game focused more on the new Paladin class, but at the expense of the other three classes, especially the Thief. Depending on how one approaches the game, he might only end up robbing a lonely, single place.
- Maxing stats: Trying to max out stats can be very difficult. There are not many places to practice climbing (however the patch does make it possible to practice climbing in the monkey village). Learning Lightning Ball so late in the game doesn't help to be a very useful skill.
New Things:
- Paladin Ceremony: Even though I tried to be bad, I ended up becoming a Paladin. Rakeesh makes you a Paladin right before the peace conference. Didn't seem to gain any special new abilities, so probably more useful to carry over to the next game. Normally I come into the game as a particular character, or am already a Paladin at the beginning, so this was a new scene to me.
- When I went to visit the Simbani village, Uhura was waiting out there and could talk with her a bit and the mourning the Simbani had for their deceased Laibon. This is an addition from the patch. I'm assuming there might have been some unused content that was discovered hidden in the game that was added back into to the game.
- During the Warrior trial, I read a fighter with climbing can also climb the tree. I have not tried this, but it provides for an interesting alternative to win the contest.
- During the Warrior trial, there was a bug with the new patch where the log did not appear, but it is possible to light the thorns on fire to get through. I only tried this on whim, but was very glad to see that this was possible.
- With the new path, the "bong music" in the apothecary sounds different, much more like a Jimi Hendrix riff.
There feels like some great potential to this game, but it fell short. Perhaps if resources had been spent on this game instead of the VGA remake of QFG1 that Wages of War would have been more flushed out. When I made King's Quest 1 - Redux, I focused on ways to improve upon the original game. I do not expect a remake of QFG3 to ever happen, but it would be fun to speculate on how the game can be improved.
Ways to Improve the Game:
- Better fighting system: I enjoyed the combat in Hero's Quest, QFG1 VGA, and QFG2, so this was not a new process, but the fighting system in QFG3 looks and feels kludgy. With some of the fights, the monster will be a floating head and arms with the body faded into the background. In the game, one of the Simbani mentions the Hyenamen, which might have been a potential monster (perhaps similar to the Jackalmen of QFG2) that didn't make the cut.
- Add more content:
- Considering how few side quests the thief had, allow the thief to sneak into the Liontaur section of Tarna and rob a place or few.
- Expand upon the Lost City. It felt like the developers ran out of steam (or time) and threw together a minimal amount of screens and called it good.
- More quests. This is the shortest of the QFG games, and far more could have been done to flush out the game further, especially for the non-Paladin classes.
- Yet another dispel potion: It was pretty novel in the first game, but became a worn out concept by the third. Still, the dispel potions were used effectively in this game (but not nearly as much in the 2nd game). I'm glad that dispel potions stopped after this game.
- Pacing: By adding more content, whether it be more side quests or expanding upon the Lost City, this wouldn't make the game feel quite so rushed once the Leopardman is captured.
This isn't a criticism of the game based upon its age, because there were better games around the same time period, but QFG3 faltered in a number of ways. The Quest for Glory series was originally imagined to be comprised of four games, each one representing the four cardinal directions and seasons. QFG3 was the game which was never originally intended (as evidenced by the end of QFG2 which mentioned that QFG3 was going to be Shadows of Darkness). Ultimately, this feels like an expansion pack to the QFG series which was used as a stop gap between Trial By Fire and Shadows of Darkness to let the hero grow a little more and to introduce the new Paladin class.
Bugs
In this latest playthrough I encountered a couple of frustrating bugs with the Fighter class, and here are the work arounds I performed to fix them.
Trying to give the Laibon the dinosaur horn to start the Warrior initiation
When I would go visit the Laibon, he would not accept the dinosaur horn, nor could I talk about it. The workaround I found was to drop (or place any existing dino horns in a trunk), then visit the Laibon to talk about about the initiation, and then go fight another dinosaur to get its horn, then the hero had a dialog option (click the mouth on ego) to tell about the dinosaur horn.
Trying to visit the Laibon after becoming a Warrior
After the initiation to become a Simbani Warrior, I could no longer visit the Laibon. One suggestion I read was right after the Initiation when the Laibon asks what favor you request, first ask about bride price so the Leopardwoman can be purchased.
No log in the second Warrior initiation rite
I believe this might be a bug due to the new 1.3.1a patch where the log does not appear. I tested the initiation with the pre-patch version and the log appeared. Fortunately, using your tinderbox on the ring of thorns also works as another option to get past this trial.
The 1.3.1a patch corrects a number of behind-the-scenes issues with this game, but there are a couple of other areas which could further improve the game.
Wages of War vs. Seekers of the Lost City
The subtitle on the QFG3 box reads Wages of War, but there are other references (such as in the About section of QFG4) to this game which say Seekers of the Lost City. Why the two subtitles? According to the series co-founder Corey Cole, QFG3 underwent a similar legal naming dispute as the first game did, which resulted in Hero's Quest being renamed to Quest For Glory. However, QFG3 was already out, so even though Sierra came up with an alternate subtitle of Seekers of the Lost City, it never ended up on any official game covers or documentation. If there had been another release of the game (in the manner that QFG4 was released with a follow up CD version), then perhaps the alternate title would have been used.
QFG3 Fan Patch
I was excited to see how the new QFG3 fan patch (version 1.3.1a as of this writing) worked with the game. The patch's GitHub web page describes the patch:
An unofficial update for Quest for Glory III: Wages of War that builds on Sierra's anthology release and NewRisingSun's speed fixes. Fixes crashes, lockups, dead ends, glitches, sprites/animations, sounds/music loops, and text. Restores cut content. Written in SCI programming language using the SCI Companion 3.0 tool. Please use the latest version!
New and Improved:
- This patch fixes a whole host of minor issues in the game (similar to what I did with King's Quest 1 - Redux).
- The biggest addition I found was the ability to talk with Uhura at the edge of the Simbani village right after the not-so-peaceful Peace Conference.
- The "bong music" in the apothecary sounds different, much more like a Jimi Hendrix guitar riff.
- Speed issues appear to be corrected. Trying to hit the moving target during the spear competition is actually feasible now.
Potential Fixes:
- As I mentioned above, there are still a couple of tricky bugs in the game when it comes to visiting and interacting with the Laibon.
- A new bug seems to have been introduced with the missing log in the second Warrior Initiation rite.
- I also never encountered any random Demon Worms when exploring the Tarna jungle and only found a single Ape Man battle. I'm not sure if this is related to the patch or just bad luck.
- Fighting is more difficult. Hero often dodges or parries when those commands were not used. Seems glitchy. The fighting system still sucks and is the worst of the entire series, but that is more of a gameplay issue outside of the realm of a patch.
Decoding the SAV files
One of the more unique features in the Quest for Glory games is the ability to transfer a character from one game to another game in the series. The only other games I can think of which had a similar feature were the gold box SSI games (Dragonlance, Forgotten Realms). This feature generally encourages the player to develop their skills as much as possible in one game so they will be better prepared at the start of the next game.
Unfortunately, QFG3 does not always give ample opportunities to properly develop all abilities (such as climbing or practicing the Lightning Ball spell). This then tickled my curiosity on learning how one might go about reverse engineering the exported character file. The exported SAV file is quite small, only a couple hundred bytes in size, which makes it an ideal candidate to reverse engineer (far more feasible than trying to dig through a game's save file which is relatively much larger.
After doing some initial research, it appears that there had been some slight variations between the different QFG export files, but like reverse engineering the AGI files, some interesting encoding trickery was used to make the SAV file's contents look like a random set of numbers which could not be easily gleaned of their true meaning. A couple of years ago, several others had dug deep into figuring out how to read and modify these files. The following are several resources of apps and web pages which can be used for viewing and altering Quest For Glory SAV files.
References
19th September 2020 | Games
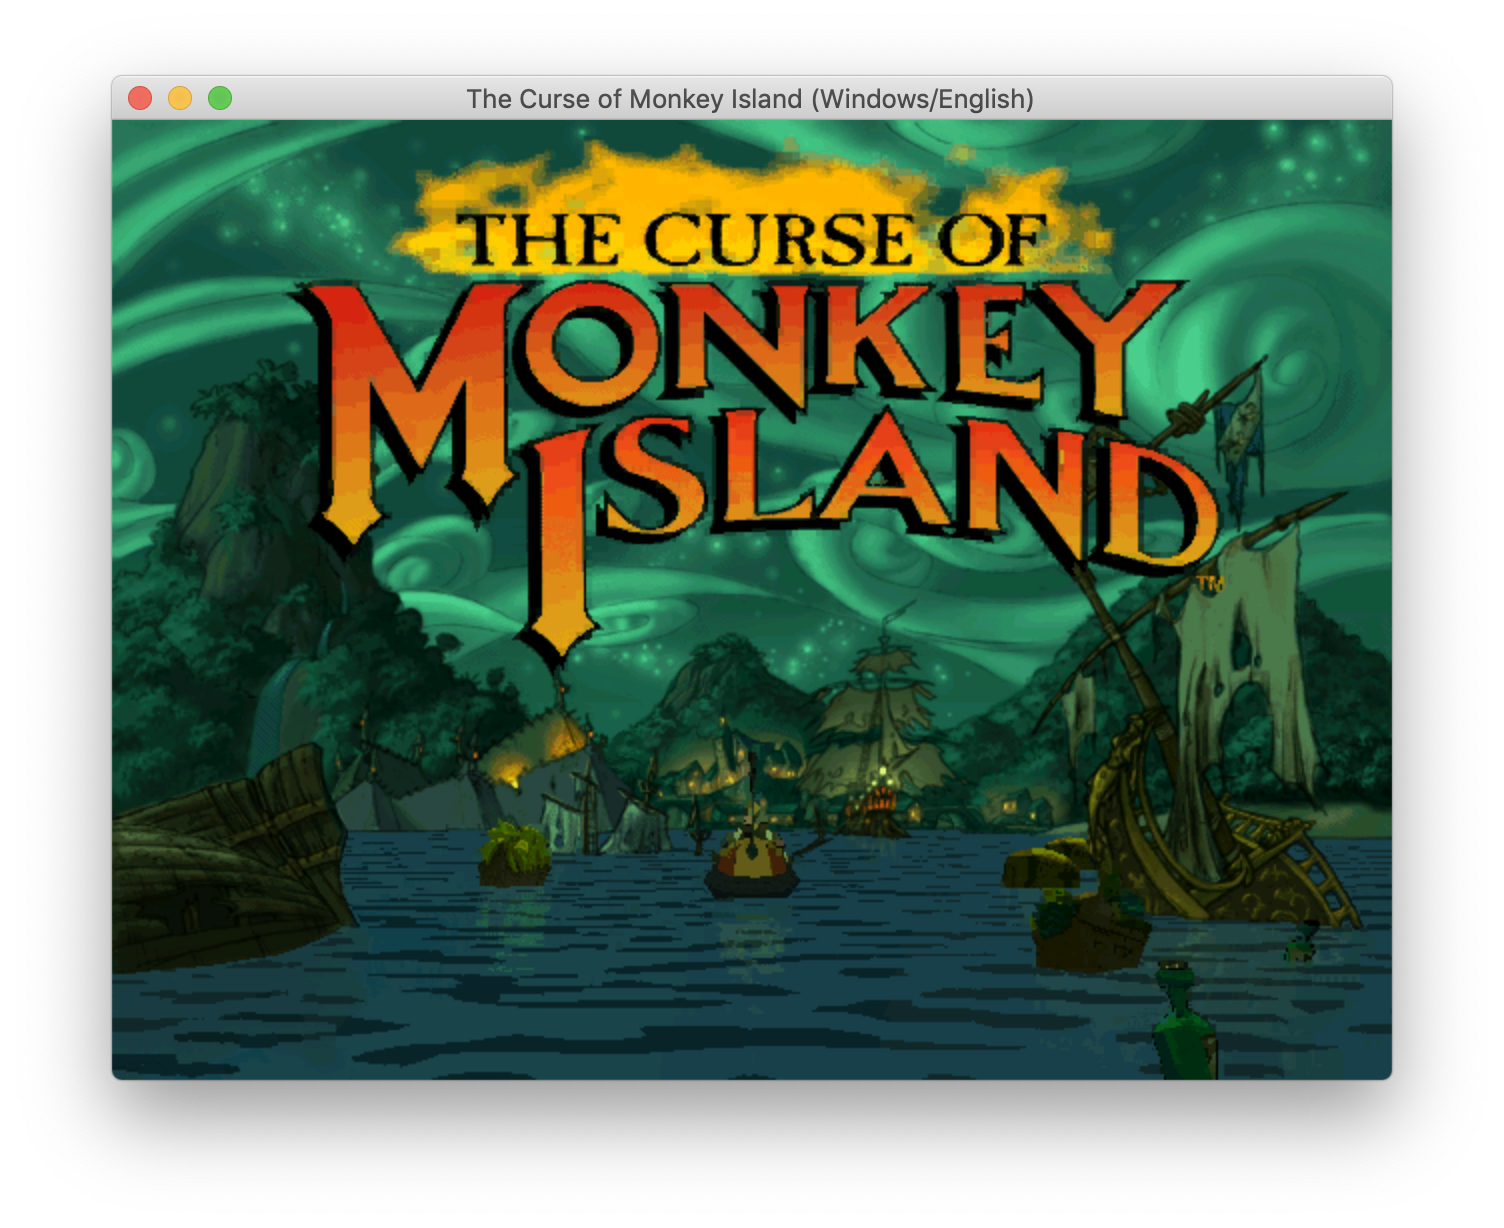
In honor of International Talk Like A Pirate Day, I've made it a yearly tradition to play some Monkey Island games. Over the course of many years I slowly replayed the remake of The Secret of Monkey Island. Earlier this year I replayed Monkey Island 2 (I enjoyed it more than the first time I played it more than 20 years ago, however the spitting contest puzzle is still awful), and now I'm onto the third entry in the series: The Curse of Monkey Island.
I still owned a boxed copy of this game, so I wanted to see if it would be possible to play it on modern systems, specifically under ScummVM. I did a quick search to see if this was possible, and I came across a page that almost seemed like what I was looking for. However, that web page merely referred the reader to the GoG.com product page. It's great that this game is available and playable under the Mac, but I did not want to have to repurchase a game I already own.
Fortunately, the way to install and play The Curse of Monkey Island under ScummVM on a Mac is fairly straightforward. Here's the instructions:
- Create a new folder which will contain the game files (e.g.
MI3)
- Copy all of the contents of CD 1 into this folder.
- Copy the contents of CD 2's Resources folder into the Resources folder on your computer (e.g.
MI/Resources). There will be a few duplicates, such as the font files, so skip those and let your Mac copy over the other files.
- Also from CD 2, copy the file
COMI.LA2 into the same folder which contains the files COMI.LA0 and COMI.LA1. Your folder should look like the following screenshot. 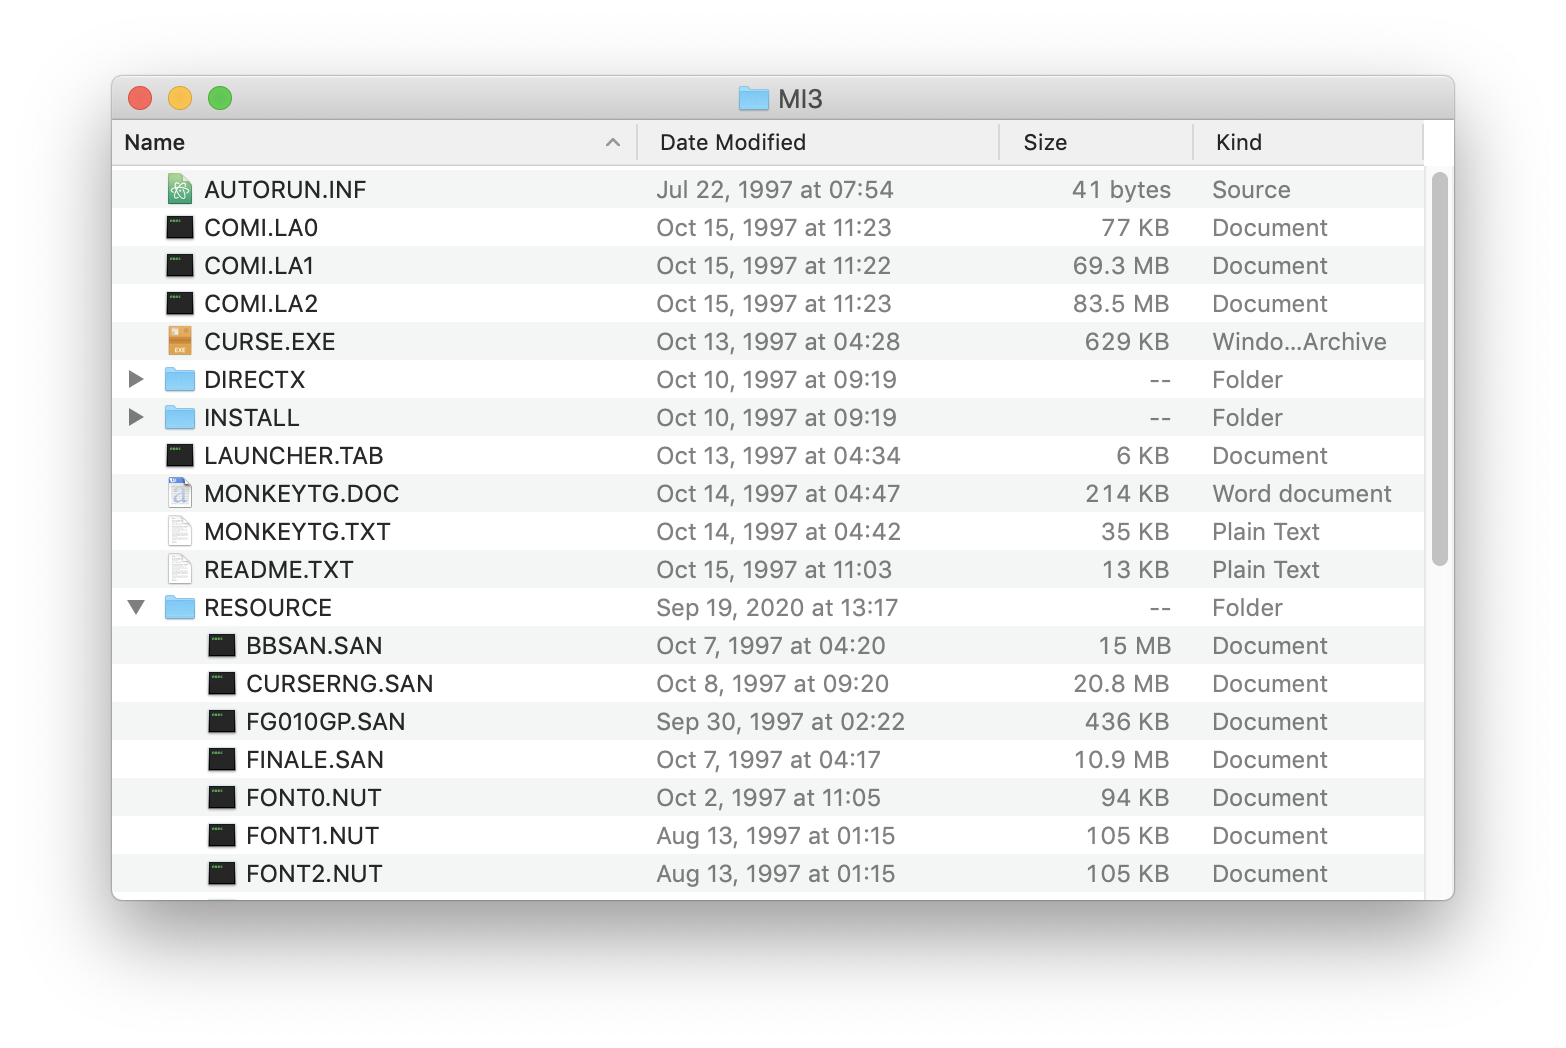
- Launch ScummVM, Add Game, navigate to your folder which contains The Curse of Monkey Island.
- In ScummVM, start up The Curse of Monkey Island
This is possible because Curse was the twelfth and last LucasArts game to be developed using the SCUMM game engine, so I assumed that ScummVM would be able to handle playing this game on the Mac. (Side Note: If you want to play later LA games developed with the GrimE game engine like Grim Fandango or Escape From Monkey Island, check out ResidualVM.)
Have fun playing and watch out for that three-headed monkey behind you!
9th September 2020 | Games
These days, playing DOS-era computer games on modern computers is relatively easy thanks to DOSBox and ScummVM. Even games which were built with Windows XP in mind have a half-way decent chance of running properly under Windows 10. However, there is a half-decade span where things get sketchy: the Windows 9x era of the 1990s. Those games which were built exclusively for Windows 95 or 98 (but not for DOS or Windows NT) have not fared well in being able to run on newer systems.
Once I inserted the CD, the autorun started, prompting me to try and play the game. However, the install option was not enabled. I then tried to manually install the game by running the setup.exe program. Windows 10 asked whether to trust the installer and then...nothing.
I first checked the Sierra Help website to see if there were any tips, but did not find what I was looking for to correct the installation issue. Fortunately, after a little further searching, I did come across what I was looking for, an updated installer which according to the website: Addresses issues some have with the original installer under XP/Vista. Installs all three discs to the hard drive for CD-less play. The updated installer for Gabriel Knight 3 can be downloaded here (mirror download link).
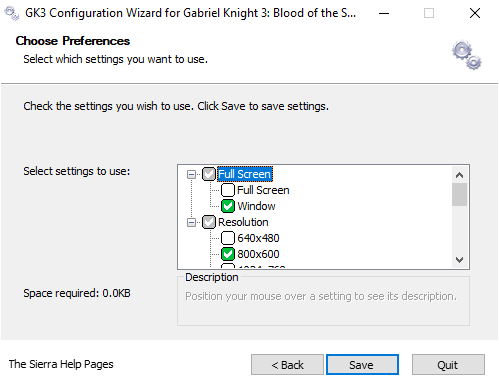
To start up the game, one might assume to go for the obvious GK3.exe file, but you will actually want to ignore that. Instead, click on Configure GK3.exe to initially set the resolution properties of the game. Set the options whether you want the game to run in a windowed or full screen mode and at what screen resolution. For streaming purposes, I selected Windowed mode at 800x600 resolution, which would have been a fairly standard gaming resolution in 1999.
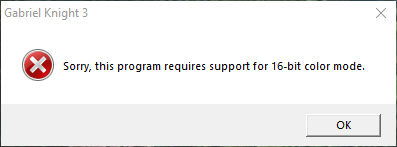
Trying to start up the game by clicking on Gabriel Knight 3.exe might result in an error that says Sorry, this program requires support for 16-bit color mode.
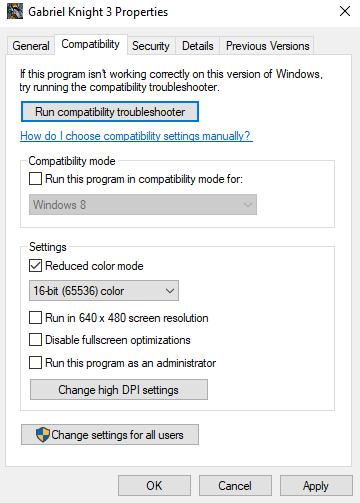
To correct this issue, right-click on the Gabriel Knight 3.exe file and select Properties. Switch to the Compatibility tab. In the Settings, select the Reduced color mode checkbox and change the drop down menu to 16-bit (65535) color.
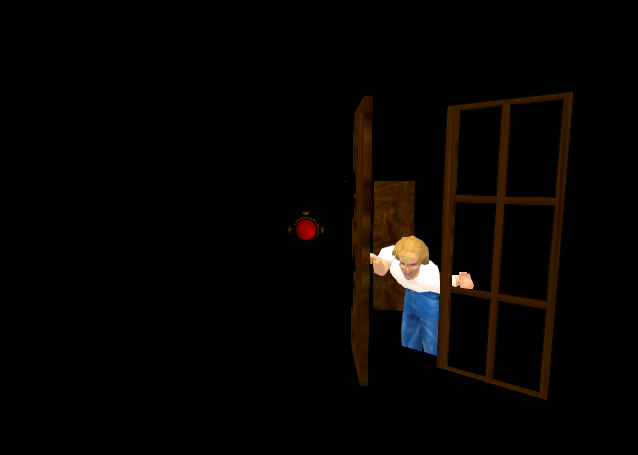
Once the game starts up, you will see the animated Sierra Studios logo, the intro, and then the game will begin. However, it only takes a bit of moving the camera to realize that things are quite wrong with the graphics performance. There are black boxes appearing around Gabriel and the rest of the screen flickers like mad. Fortunately, there is a quick fix for this.
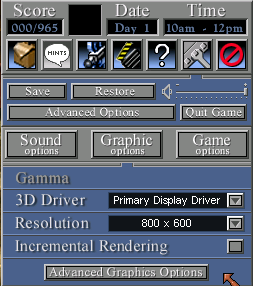
- Right-click anywhere to bring up the game options
- Click on the Advanced Options button
- Click on the Graphic options button
- Deselect the Incremental Rendering checkbox
These instructions should get you started so you can start exploring Rennes-le-Château in all of its garish, blocky 3D glory! *sniff, sniff* Is that maple syrup I smell?
References


